
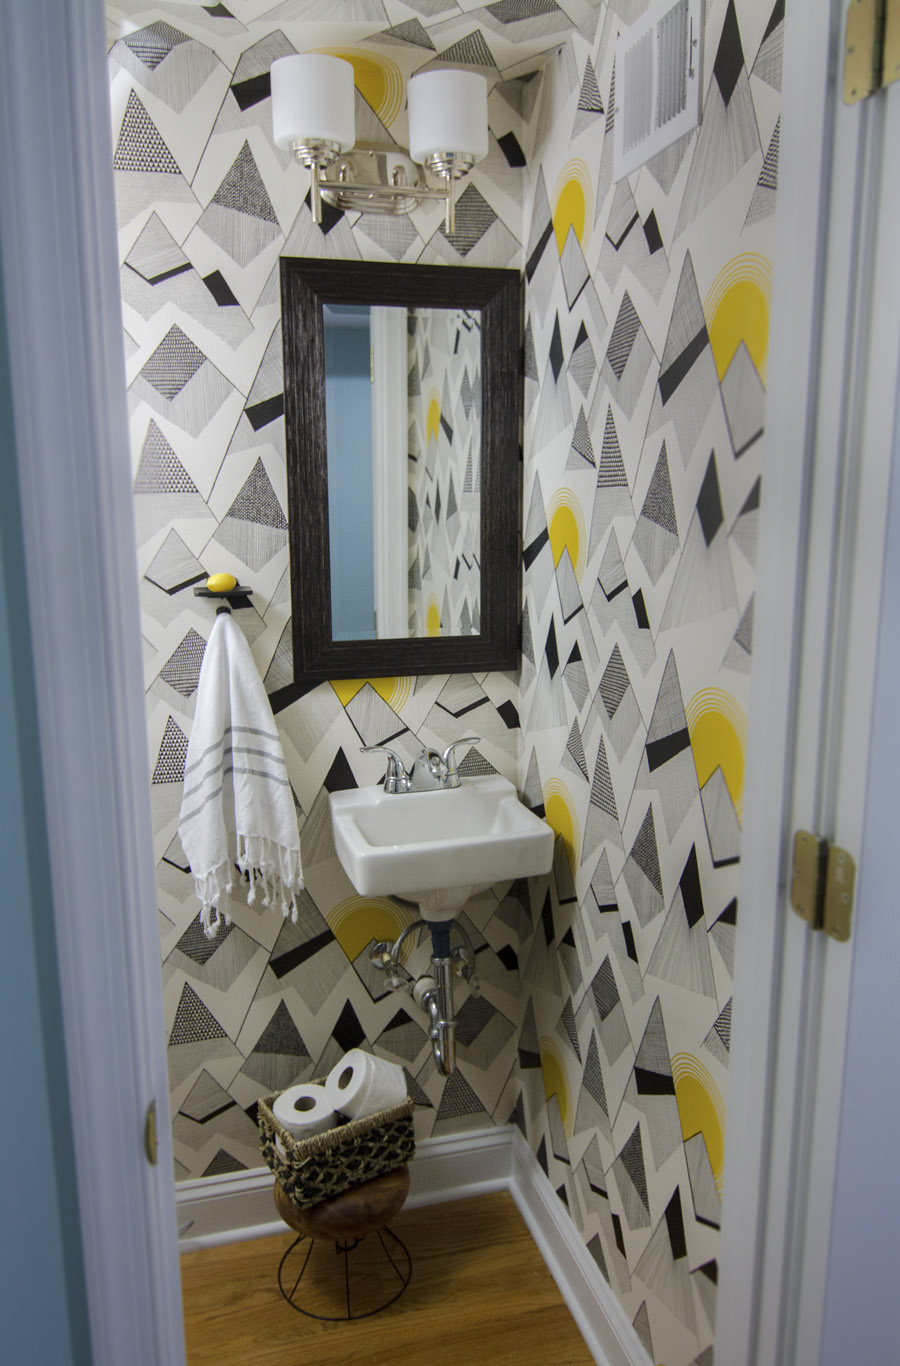
It's done! It's done! The powder room is done!
If you’re confused because you saw me finish the wallpaper 4 months ago, then that makes two of us. What feels like an eternity in blogging years was double that IRL (that's 8 months, in case it's too early to be doing math where you are). And yet the powder room was still not finished! What was the hold-up, you ask??

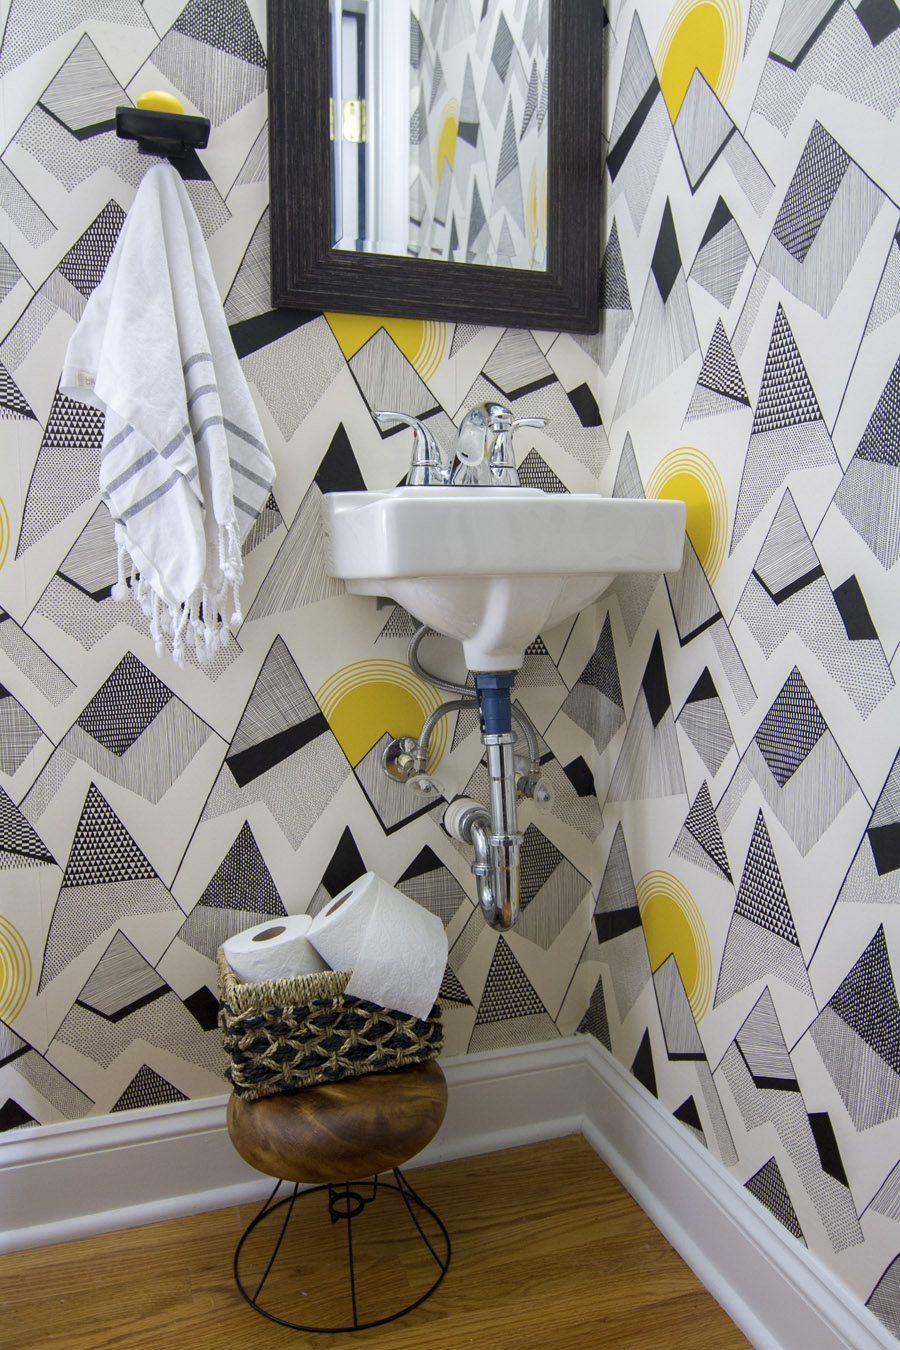
A spot for the soap & hand towel. A small thing, I know – & yet so important. I should probably be embarrassed, but I’m too busy being relieved. It was like running the race of my life and then crawling the last 20 meters in Crane Pose. Anti-climactic much?
I've never given much thought to the soap & hand towel sitch in other bathrooms. The soap goes on the counter, the towel goes on the towel bar. #NoBrainer And yet suddenly it wasn't so obvious once I found myself with a doll-sized bathroom, a doll-sized sink and wallpaper that I'm terrified of putting holes in. What I really wanted was this mirror from Anthropologie (or this one!) with an attached shelf for soap because that would be a 2 birds 1 stone scenario – but I couldn't bring myself to spend $300 on a mirror for the powder room. Maybe someday...
I was driving myself crazy looking at affordable options & liking none of them when I stumbled upon these little cuties on Signature Hardware’s website. They were simpler and more rustic than anything I'd considered before, but I think that’s what I liked most about them. The wallpaper is the true star here, and these guys are perfectly happy to be out of the limelight and revel in their understated charm.

Gardenia Soap Dish

Solid brass hook with porcelain knob
I was gonna have to suck it up and put some holes in the wall. Four to be exact – enough to nearly give me a heart attack! So I did what any normal person does when they think they're having a heart attack – I consulted the all-knowing interwebs. Obviously. Experts seem to agree on this method for protecting the sanctity of your wallpaper: cut an upside down V in the wallpaper, peel it down and put your nail hole directly in the drywall. Then, when you decide to move whatever was hung there, you should be able to paste the paper flap back where it was for a seamless repair. It sounds pretty clever – but I'm hoping I never have to find out if it actually works. I just went with it, and so far so cute.

All the success stories I’ve read to date talk about using this trick for itty bitty nail holes. I, on the other hand, needed some big honkin’ craters for drywall anchors and screws. That complicates matters because any repairs would require me to remove the anchors, spackle the gaping hole
where my heart used to be
and sand it down to be level with the drywall I can no longer see – all without messing up the wallpaper. Should be fun! This is either a really dumb idea, or it’s a perfect example of "scaling up." Don't worry, guys. I have some spare paper lying around if things go totally bananas.
If you have wallpaper and feel like taking a leap of faith with me, here’s how I hung these fixtures:
1. I started by choosing a position on the wall. This gets its own step because what's usually a simple task feels like a high-stakes gamble when wallpaper is involved. I wanted the soap & towel to be convenient to reach when standing at the sink so guests don't have to bend down, reach up, or smush their arms like a T-Rex to dry their hands. I also wanted them to sit at a point in the pattern that would help me camouflage future hypothetical repairs.

2. Next, I leveled the hanging plate and just barely marked my holes with pencil. When I say "just barely," I mean my mark could have been confused for a microscopic dust particle. It’s a miracle I could see it at all.

3. Then I held my drywall anchors up to the wall & centered it on the microscopic-dust-flake-of-a-mark to determine how big of an upside-down V I needed to cut. The answer, to my dismay, was “Really big.” : [

4. Then for the “Here goes nothing” moment — I used an Exacto knife to cut the upside-down V big enough to comfortably surround the drywall anchor on all sides....... What's done is done.
5. Gently, carefully, nervously I peeled the wallpaper back from the wall and bent it down. My two cut-outs looked like evil Jack-o’-lantern eyes saying, “What have you done?!”

6. Then it was time to bring out the big guns, and by guns I mean drill. I drilled 1/4” holes on my original marks and then screwed in the cool drywall anchors that came with my soap dish. Those eyes just got a little creepier...

7. From there it was a matter of attaching & adjusting the hanging plate so it was level. I screwed it in most of the way, checked the level and then tightened it down. The actual soap dish hooked onto the plate with a little screw.

It was essentially the same dealio for the towel hook, but with smaller holes and cutouts. Thank god. So there you have it. This room is fully functioning now! And my little Low-Cost-And-Found stool that I made from a lampshade is doing a fine job holding that extra toilet paper!
This entire powder room makeover cost me less than $150, and the results are not too shabby if I do say so myself! It wins the honor of being the first "finished" room in the house. Also the smallest. ; ] Huge thanks once again to Dana Miller of HouseTweaking & Wallpaper Direct for gifting me this awesome wallpaper. The pattern is "Mountains" by Miss Print.