That sounds like the subject line of a spam email if I’ve ever seen one, but I swear it’s true! Back on the eve of Christmas Eve, Eli discovered water spilling out of the cabinet under the kitchen sink and onto our beautiful new floors...cue panic. Santa must have known this was *just* what we hoped for the night before we left town. There was no time to fix it, so we turned off the water supplies (to the sink and to the rest of the house), and we hoped for the best. When I got home about a week later, I found a plumber thru Angie's List who didn't charge the usual $75 or $100 to come give an estimate, and I thought, "Cha-ching!" In hindsight, this might have been a red flag.
The plumber turned the water on aaaaand....nothing. No leak. Isn't that how it always goes? You've got a problem until you're standing in front of someone who can actually fix it? Ugh. After almost an hour of him "looking," I pulled a "mind if I take a peek?" and literally found the water in 30 seconds. Granted it wasn't a lot of water like it had been the week before, but I should have known at that point that he was a crappy plumber (pun intended). Regardless, I just wanted him to fix the sink so I could get the kitchen back to normal... that was until he said it would cost $630. *record player screech* Say whaat?!
He said we'd have to replace the faucet, and his quote included $255 for the one in his truck (not a great price, but whatever) and $375 FOR LABOR. Now, I'm no plumbing expert, but that sounded really high. Why so much for a simple faucet swap?
Well, he complained a whole lot about our little corner sink and insisted on removing the garbage disposal to reach the faucet behind it and then reinstalling the disposal. No disrespect, but this sounded like a personal problem to me. A more nimble person could probably get in there fine without removing the disposal and inflating the price... like Eli nimble...
(Please ignore the messy counters...leaky sink)
I told the plumber, "thanks but no thanks," and that I would shop around for a cheaper, nicer-looking faucet. I mean honestly, if I have to replace a faucet that never bothered me to begin with, it sure as haayyyyl better be a stylin' upgrade! Plus, the leak had dissipated for whatever reason, so it didn't really qualify as an "emergency" anymore and could wait for Eli to take a look.
Now, let me stop for a moment to clarify – I'm not suggesting every plumbing problem is a DIY or that plumbers aren't worth the money they cost. We hired a plumber the first month we lived here because water was leaking from the upstairs shower and coming through the recessed lighting in the kitchen. We paid a little more than $400 for a plumber to fix it, and it was money well-spent. What I AM saying is to trust your gut. If a plumber can't show you the problem and explain exactly what is causing the leak, or he gives an estimate that seems disproportionate to the size of the problem, OR you have nothing to lose by tinkering on your own, then you may want to consider telling that plumber to bugger off. You can call another one to get a second opinion or try to fix it yourself... we chose the latter and thank god we did. It was ridiculously simple AND free! Here's how Eli fixed it.
Step 1: Follow the water to find the source
The plumber guessed the leak was coming from a plastic piece that was not sold separately, thus the need for a new faucet. He was wrong. Eli keenly noticed a dark ring on the underside of the granite counters that looked a lot like water – an indication that the problem was likely above the sink. Smarty pants. We had often noticed water around the faucet while doing dishes but assumed it was just from splashing. Not so! Upon closer look, Eli found some leakage at the seam where the handle rotates. Ding, ding, ding, ding, ding!
Step 2: Turn off the water
Before we started dismantling the faucet we had to turn off the water using the knob under the sink. For a brief moment we considered skipping this step and transforming the kitchen into a slip'n slide. Maybe next time... ;)
Step 3: Remove hot-cold indicator
Our faucet doesn't have any branding or insignia so I can't tell you with certainty who made it, but to disassemble it we first had to pry off the little indicator that says which way is hot and which way is cold. A flat screwdriver did the trick without scratching the finish.
Step 4: Remove the handle
Eli used an allen wrench to loosen a set screw the lives inside that hole. Then he removed the handle and the cap it rests on.
Step 5: Loosen retainer nut
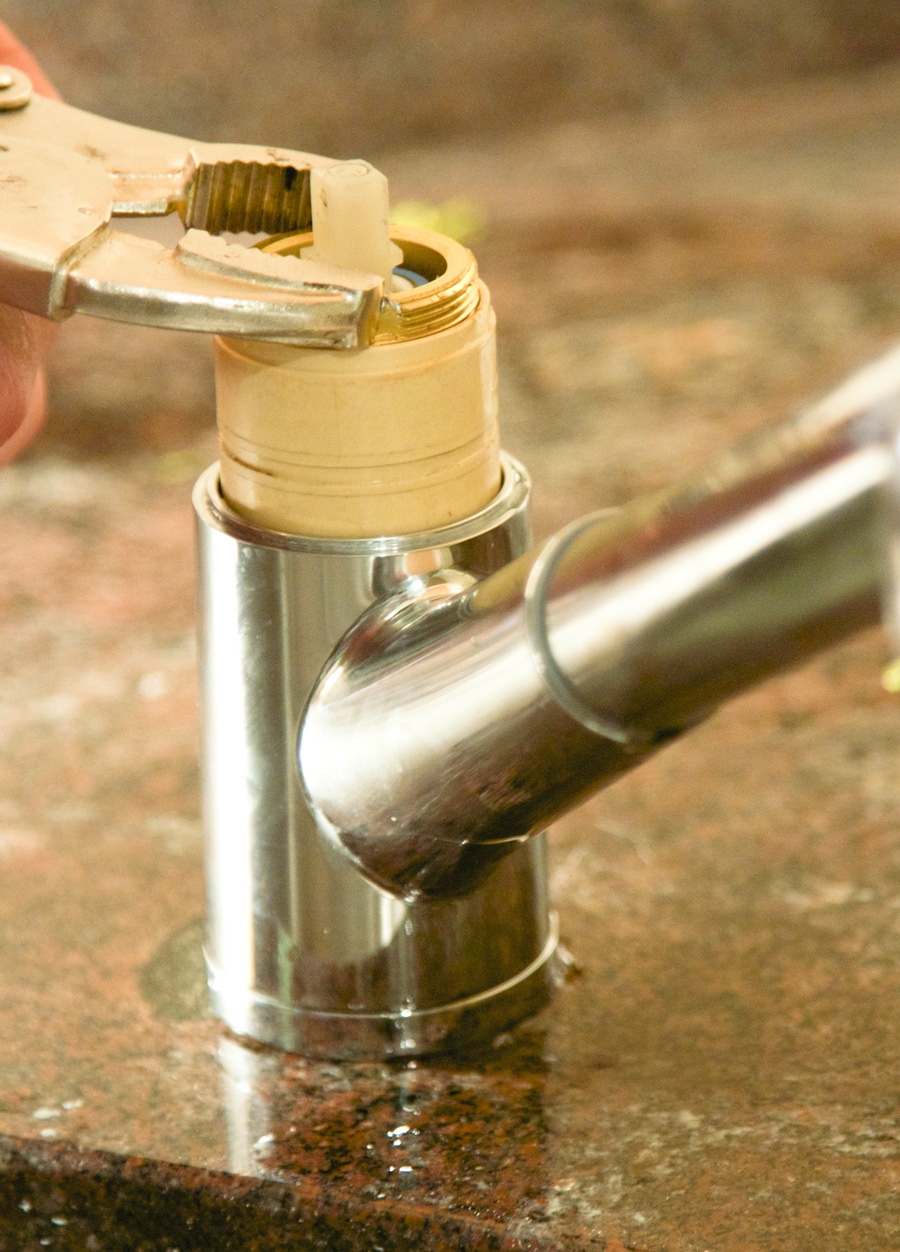
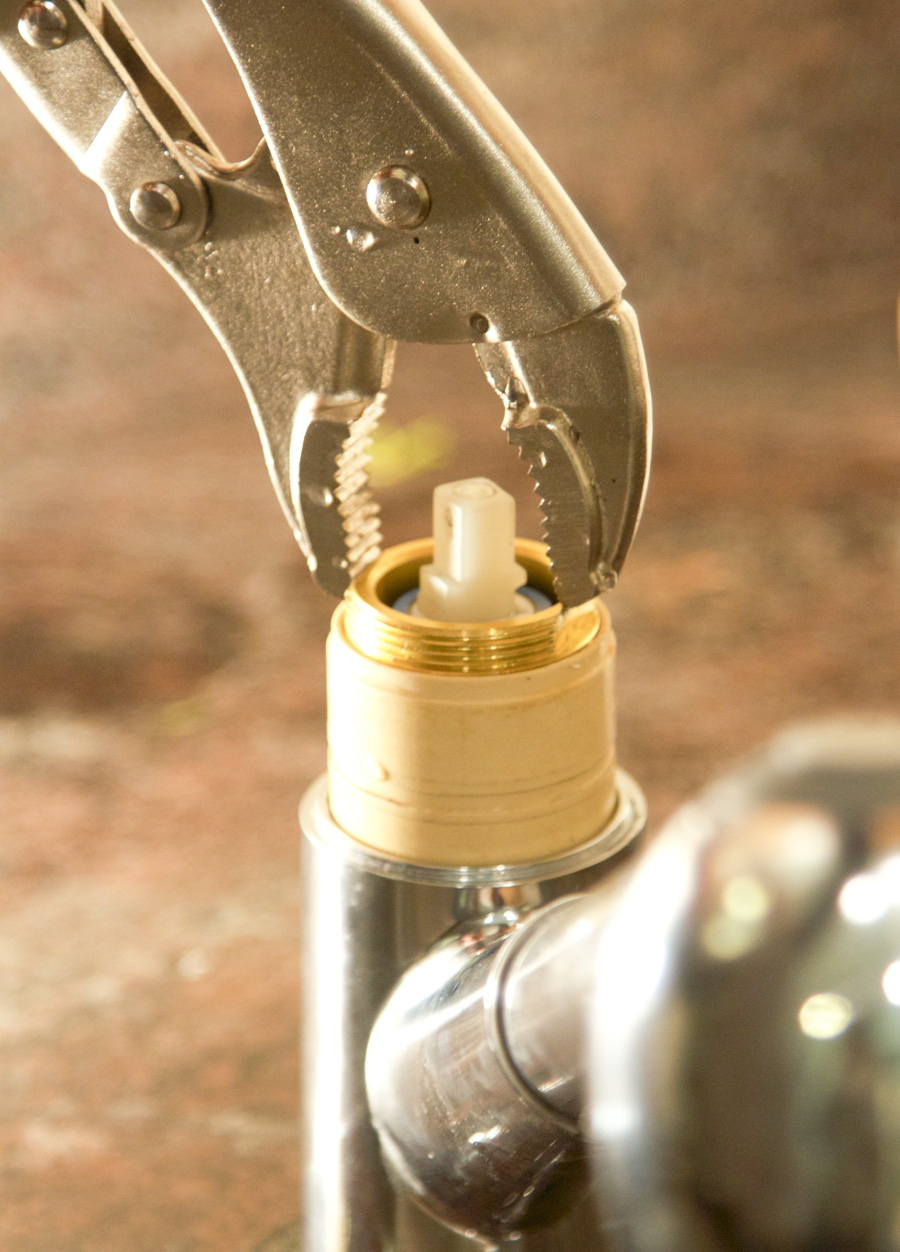
He used a vice grip to unscrew the gold retainer nut, but a big adjustable wrench would have been better. The vice grip can easily chew up the threading, so he had to be careful with that.
The gold retainer nut is what holds the blue hot-cold cartridge in place. The cartridge is where hot water is mixed with cold to give you whatever temperature you're going for. We knew NONE OF THIS before taking everything apart – sinks are fascinating!
Step 6: Ensure cartridge is properly aligned
The rings on the bottom of the blue cartridge are supposed to line up with similar rings on the beige valve gasket, and the water flows through them. In our case, the gold retainer nut that was supposed to keep them aligned was not properly tightened down, so every time we turned the faucet handle we loosened the nut a little more and weakened the seal. Without a tight seal, the water was spraying inside the faucet and leaking down through the base. We found the leak!
Step 7: Tighten it down
To fix it, Eli just lined up the cartridge with the valve gasket and tightened down the retainer nut to keep them in place. This took a little bit of adjusting – make it too tight and the handle is really hard to move, make it too loose and the sink will leak again. Eli got it just right, so the handle is harder to move than it was, but not so difficult that it's annoying.
Step 8: Re-assemble the pieces
All that was left to do was put it back together...play that tape in reverse! He layered on the cap and handle, tightened the set screw with the allen wrench, and popped the hot-cold indicator back on. !moob-adab-gnib-adaB ...... Bada-bing-bada-boom!
Our sink is back in working order, our floors are safe, and our wallets are full. Well not full, but you know ... less empty than they would have been. Eli's penchant for taking apart things he knows nothing about really paid off! ;]
Would you guys have risked it? Any other plumbing saves we should know about?


