
Someone recently informed me that it’s now fall… Exsqueeze me while I screech this record player to a halt. What the heck happened to summer soirees and pool days? Fall is beautiful and all, but it’s the start of a mad dash to finish our outdoor projects before the cold sets in. Perhaps you can relate – unless you’re in LA and have nothing but time and good weather, in which case, why rush? Next week we’re hoping to stain the deck (weather permitting), and when we do we’ll also stain this sweet A/C cover Eli made a couple months ago.
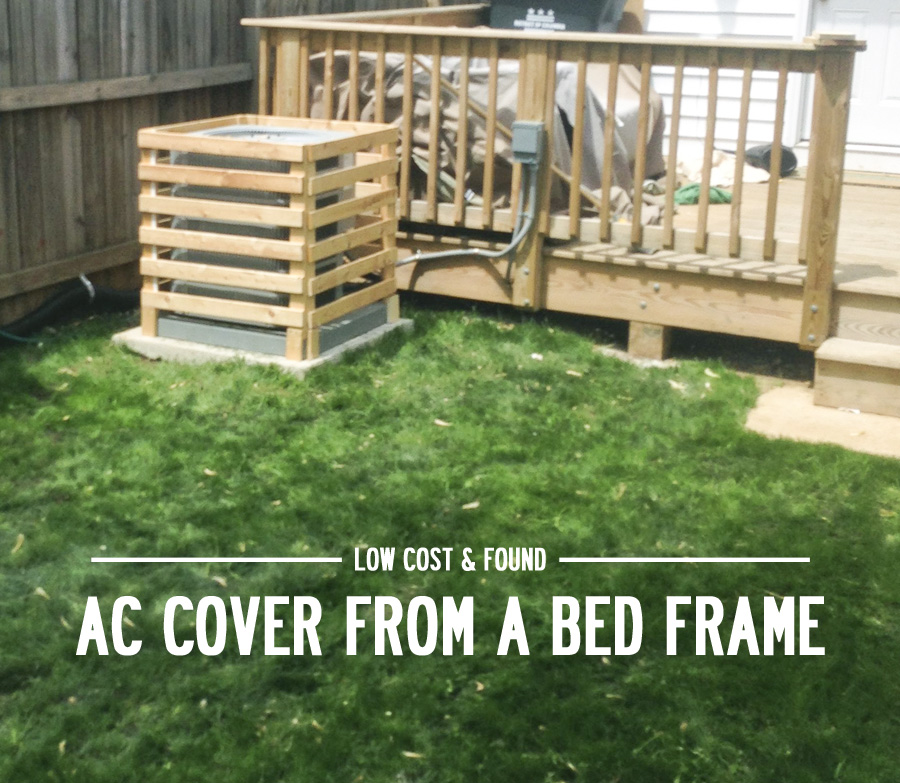
[Let's all just pretend we don't see the mess on the porch – mkay? Avert your eyes to the AC cover and that soft billowy grass! Don't you just wanna curl up and take a nap in that meadow?]
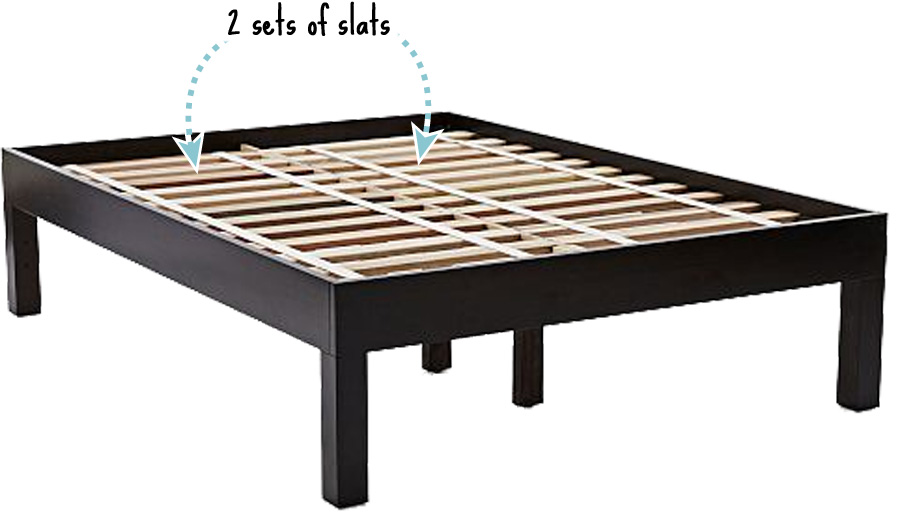
I usually play the role of DIY aficionado in our house, but Eli takes the reins every once in a while to show me what’s up. To be honest, I don’ hate it. One day when I was out of town he repurposed the wooden slats from our bed frame into a cover for the eyesore that is our A/C unit. You may remember that we converted our West Elm platform bed to hold a boxspring and no longer needed the slats that came with it. Rather than throw them out, he came up with this quick, easy & environmentally responsible DIY. Good work, Eli! What's even better is that all he used was a drill & some wood screws.
Our bed frame came with two sets of ~30" long slats – conveniently a few inches longer than both the width & height of our a/c unit, so we didn't need to make any cuts. Small victories! Each slat was attached to the next with some simple webbing that spaced them about 2.5” apart when laid out – a useful guide when it came to screwing the cover together.
To start, Eli used a knife to free up 8 slats from the webbing – 4 from each set. I recommend using scissors instead of a knife cuz I like having 10 fingers & 10 toes, but Eli lives dangerously. These free pieces would become the vertical ends to form the box corners.
Then he laid out the remaining connected slats and lined one of the free pieces of wood across them perpendicularly to determine how many slats it would span. The answer for us, my friend, was six. He cut the webbing after every sixth slat to give us 4 sets of 6 attached slats. He laid out a section (helps if the webbing is facedown), overlaid an end piece across the top, and used screws to attach it to each slat. Then he lined up another end piece across the bottom and did the same. He rinsed and repeated for the other three sides of the cover.
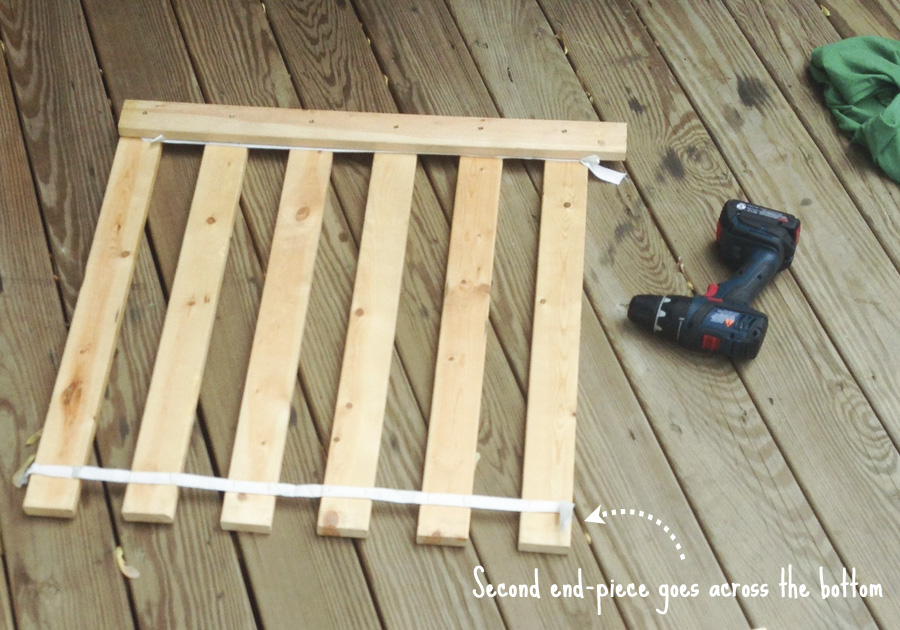
Once he had his four sides assembled, he stood up two at a time, squared the corner, and drove a few more screws through the vertical pieces to connect them all. It helps to pre-drill the holes so you don't split the wood, and he earned a few extra credit points for using a countersinking drill bit so the nailheads sit below the wood's surface. If we're feeling ambitious we may putty those holes before staining, but it's just an outdoor utility cover, so I'm honestly not too concerned about hiding screws.

After all the wood slats were secured, he cut away the rest of the webbing. There he goes living dangerously again...

And that was pretty much that! He just set the new wood cover over the unit, and BAM! Our a/c is now camouflaged to blend in with its surroundings. We didn’t attach it to the unit or the ground in any way and haven’t had any issues of it blowing over or moving. Added bonus: we can easily lift it off if we ever need to do any cooling repairs. The simpler, the better!

The cover gives the unit a few inches of breathing room on each side, and the space between the horizontal slats is wide enough that I don’t worry about hindering a/c performance.
I'll make sure to post new pictures after we get everything stained. We just need a few consecutive rain-free days in the forecast before we can check that off the to-do list. Personally I was really impressed with Eli’s zero-cost solution for a common backyard problem. What have you guys tried to hide the ugly gray box?