
Remember when I showed you how I built a knock-off West Elm headboard? I promised that I'd show you how we got a new, classy bed frame fo' freezy but then I left you high and dry for 2 months! Alas, life imitates art. I finished building my headboard months before I actually got to enjoy it on the wall (leaning against the wall beside the bed doesn't count). I'd look at it sitting on the floor every morning and think, "Someday you'll get promoted, kid"... its fate was in limbo til I could find the right bed frame.

The frame needed to be modern, on legs, without a headboard or footboard, and it needed to accommodate a boxspring without making the bed 4 feet tall. In case you didn’t guess from the italic-bold-combo, that last one was the kicker. I quickly learned in my search that platform beds (so named because they provide a wooden platform for the mattress to lie on) are now officially “the rage.” Apparently that box-spring that cost me extra was now being deemed by the bed-sellers of the world as redundant. Ugh.
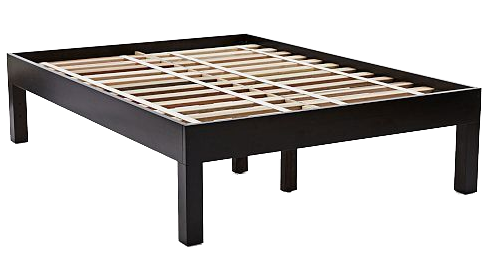
I love my box spring. They've come a long way from the days of hard metal coils – it's far better at evenly supporting my mattress than any platform, and I sleep easier knowing I'm not invalidating a warranty on a pretty expensive mattress. This trend toward platform beds is problematic for box-spring devotees like myself because we’re forced to either throw out the ‘spring, stay married to the bed skirt, buy a new "low-profile" boxspring or sleep like “Princess & the Pea” 10 feet in the air (obviously hyperbole – my ceilings are only 8 ft). I give you Exhibit A, in which I try on a cheap metal platform bed for size:
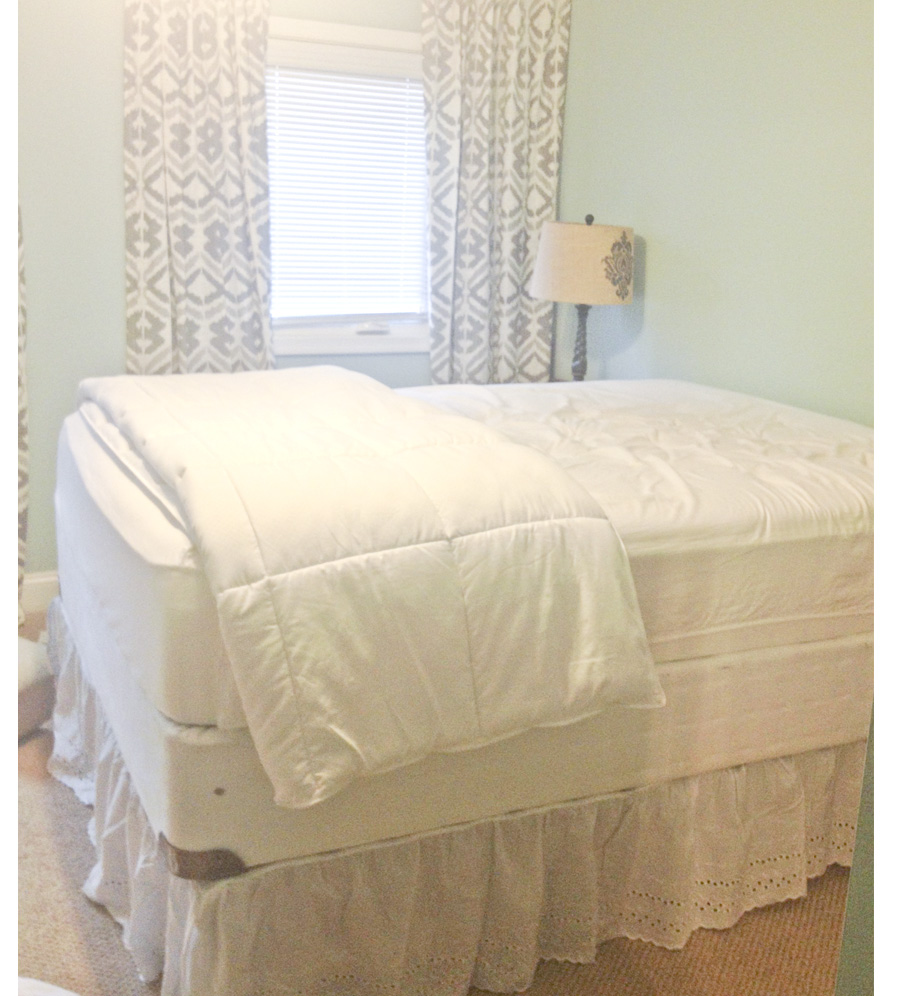
Bahaha. Nope. Not pictured is my ceiling fan hanging a mere 3 feet above the bed – I can see the headlines now: "Girl Wakes to Biggest Nightmare, Beheaded by Ceiling Fan." That meant this simple option I liked from West Elm was out of the question – 8" too tall and, even still, the $399 price tag was hard to swallow.
That is, until Eli sent me a Craigslist curb alert for this exact frame. YAHTZEE. That, my friends, is what we call freakish luck, but i-dont-hate-it. I wasn’t gonna spend $400 on a frame that didn’t fit my needs, but I'd happily take it for $Free.99 to try our hand at reconfiguring it. Worst case scenario, we'd totally ruin it and be back to where we started. I was fairly convinced that's exactly what would happen, and I didn't really want photographic evidence if it did, so I was a bad blogger and left the camera in its case. Tsk, tsk. You could say I was pleasantly surprised when it worked, and I'm kicking myself for not taking photos. We've been sleeping on it for 6 months now and are well-rested enough to tell the tale. I think there's a lesson here about doubt and faith and bootstraps – lemme know if you find it.
All this is to say that I have illustrated the process like an Ikea manual so you too can make amends with your boxspring and stick it to the man. Platform beds be damned! (Unless that's what you want...nothing wrong with 'em if you don't want a box spring or don't mind a taller bed) I recommend trolling Craigslist for a wooden platform frame or start fresh with raw lumber – Ana White has some guides for building a bed from scratch.

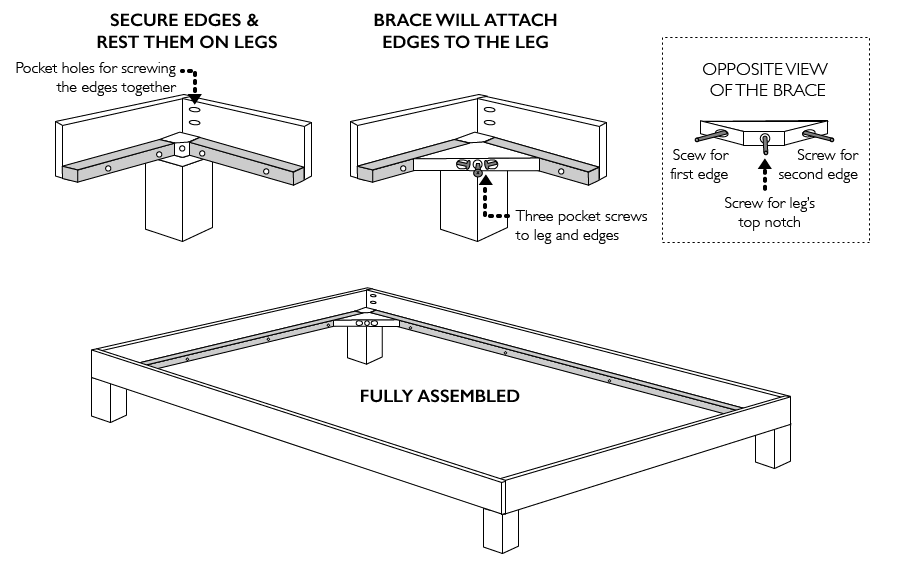
Step 1: With the frame disassembled, carefully remove the wood strip (colored light gray here) from the inside of the main frame using a screwdriver and a crowbar. The goal is to preserve the wood strip (and the frame) so you can re-attach it lower down – that means don't Hulk out and break it to bits! This took some doing on Eli's part because the strip was secured using both screws & wood glue (yay – quality carpentry). Much of the veneer chipped off in the process, but we weren't too concerned since no one well ever see it (except I'm showing the whole world at the end of the post...no shame). On a platform bed, this strip is usually an inch or two from the top of the frame and is used to hold the platform for a mattress. We'll be moving it as far down as we can to make room for a boxspring.

Step 2: Sand the chipped edge of the strip to smooth it out and then use wood glue and the screws you previously removed to re-attach it flush with the bottom edge of the frame. Lining it up with the bottom edge ensured the strip would be level and even on all sides when we reassembled the frame. Depending on the depth of your edges, you can potentially gain a lot of room for the boxspring this way. Our 'spring is 8.75" deep, the outer edge of our frame is 5" deep, and after relocating the strips we had 4 inches within the frame for the 'spring to sit in. That means 4.75" of the boxspring are still peeking out above the frame, but we take what we can get. If your edges are really shallow, these first three steps probably aren't worth the effort and you should skip to step 4.
Step 3: The bed's legs had notched tops that the edges rest on. This notch also provided two pre-drilled holes for securing the leg to the edges. We measured and cut down the notches so the tops would be flush with the wood strips we had just lowered. This provides one flat, level surface for the box spring to rest on. In cutting down the top, we lost the top hole for securing the legs & edges, which would have compromised the stability of the entire frame had we not also shortened the legs.

Step 4: At this point, we've bought ourselves 2.5 extra inches, but you may remember I said we needed more like 8. Gulp. To get us the rest of the way, we cut about 6 inches off the bottom of each leg using our circular saw. This was a little nerve-wracking because we didn't want to end up with 4 legs at slightly different heights (and a lopsided bed) – granted, my nerves were a little more wracked than Eli's ; ] We carefully measured and marked our cut on all four sides of the leg, made the cuts, and then used the palm sander to even out any small discrepancies, giving us 4 equally tall legs. Phew! Cutting the legs down by about half compensated for the stability lost when we shortened the top notches. Less length = less torque, so our bed feels as sturdy and clocks in at 11 inches – an ideal height for our boxspring/mattress duo.
Step 5: Reassemble! We used the pre-drilled holes from the manufacturer to put everything back together. The edges are screwed together with pocket hole screws (we used the drill to widen the pocket holes so our screwdriver could reach further in). Then we set the outer frame up on the legs and used the wooden braces that came with the bed to secure everything. There are 3 drilled-thru holes in each brace – one for each adjoining edge and a third for the leg. These braces are really what's holding everything together – without them the frame would be a wobbly mess and we'd be knockin' on heaven's door every time we got into bed.
We nixed the center beam that provides a 5th leg in the middle of the bed. You need this leg if you have a king size bed, but after checking online I found that the center support wasn't really necessary for a queen or a full. If we ever decide to add it back, we'd just need to cut the height of the 5th leg and secure the beam to the wood strips with metal brackets. We haven't done that because 6 months in the box spring still seems sturdy without it. Use your discretion :]
The whole project took a few hours and cost less than $5 (we picked up some new screws). It's just what we were looking for! Now I don't have to worry about breaking a hip climbing into bed or getting my head chopped off by the ceiling fan, and my headboard finally got its rightful spot on the wall. I can rest easy now!
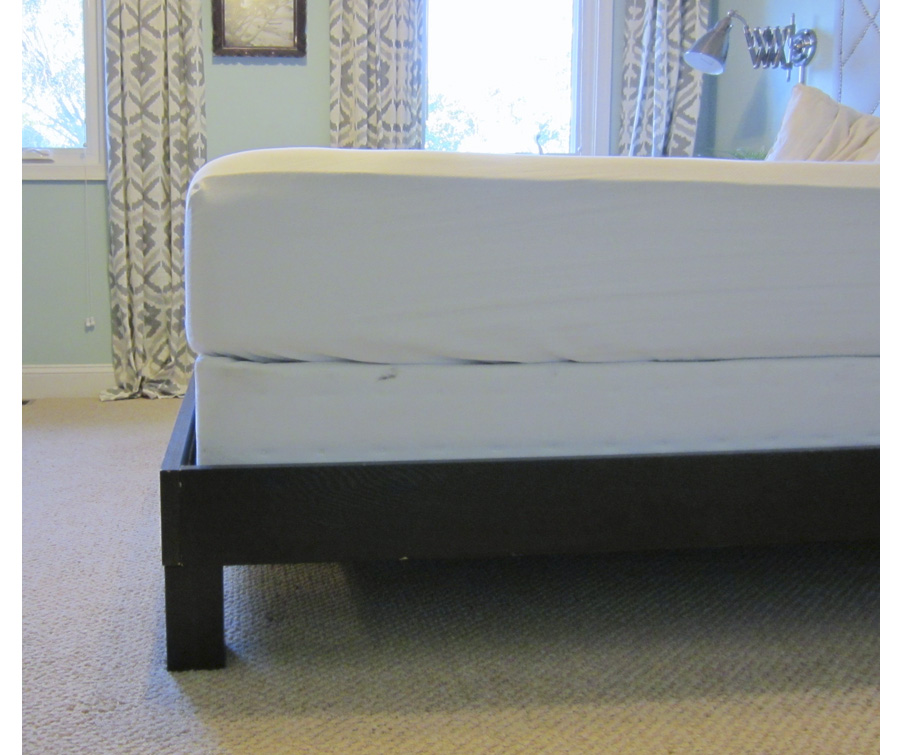
Enough sketches. How about some real live photos? Eli helped me remove the mattress and boxspring yesterday so you can see the gritty details (when I say gritty, I mean griiiiiitttaaaaaayyyyy)!
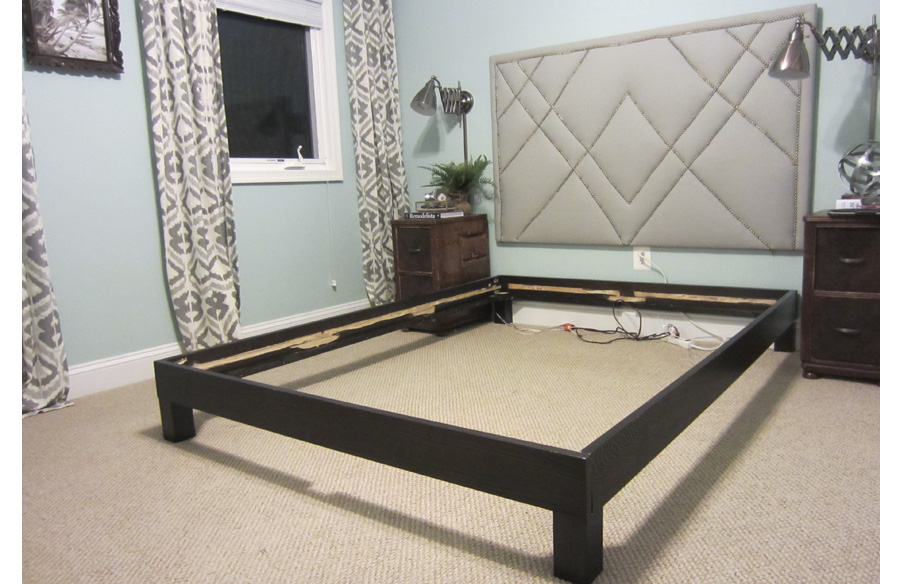


The inside is scary – like a tiger sharpened its claws here – but the outer appearance is perfectly serene. I'm really happy with the finished product and now there are just a couple finishing touches left. I want to find or make a boxspring cover (since half of it is still exposed), get a duvet cover that will be easier to throw in the wash, and upgrade the pillow situation ... ours are getting worn out and I love the look of Euro shams.
The new wood frame is an upgrade in many ways from the metal frame + bedskirt situation we had going on before, but the main reason I switched was to make the room look and feel airier. Being able to see under the bed – or any large piece of furniture, for that matter – adds visual breathing room. I try to keep this in mind any time I'm choosing furniture for our little house.
So there you have it. Am I the only person still using a box spring?! Has anyone had luck with their platform bed or thinking about reconfiguring their current setup?