
I can't really put into words how excited I am about what just happened here, so I'l have to settle for this:
EEEEEEEEEEEEEEEEEEEEEEEEEEEEEEE!!!!!!!!
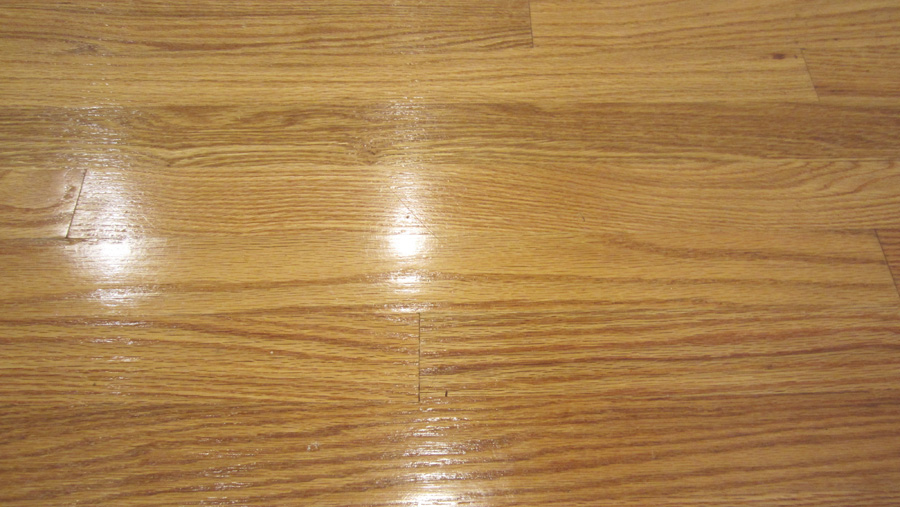
That's pretty much what Eli and I have been doing since we got home on Thursday night to see our new floors – except in sock feet, obvi! The last 18 months felt like an eternity of waiting to banish the yellow-orange basketball court that was our hardwoods. Dramatic? Yes. But they were so pervasive and affected how I felt about everything else in the house. Having them refinished feels like this huge weight was lifted off my shoulders, and suddenly I feel reinvigorated and excited about the future!
Who knows how much longer I would have put this off if it weren't for you guys helping me decide on a color – so THANK YOU! After we went through that whole process of voting and photoshopping in different options, I was really nervous that I wouldn't be able to translate "grayown" into a real life stain. I dunno about you guys, but I think I got pretty darn close! Let's look at some before and afters, shall we? First stop: the living room!
Goodbye, Barf Simpson...
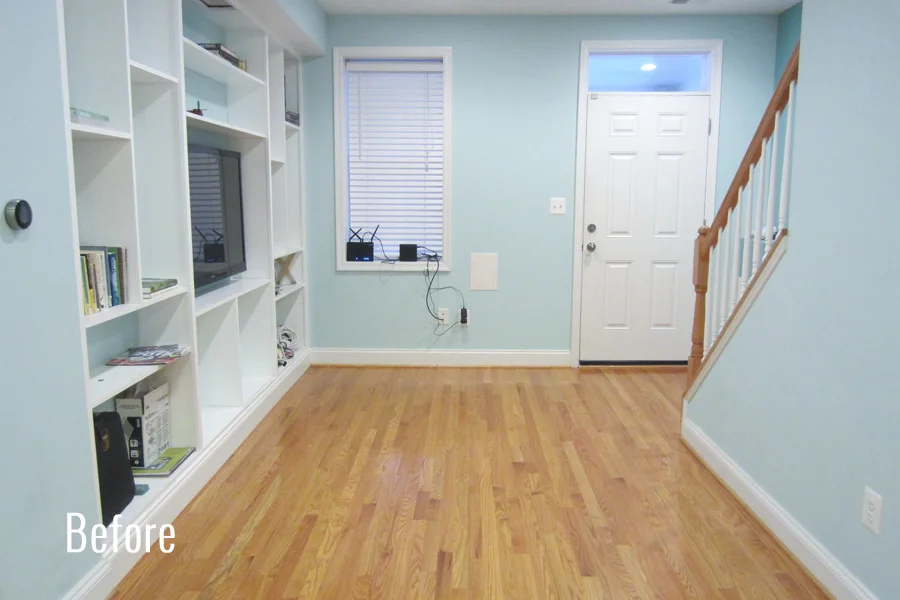
Hellooo, Grrrayown

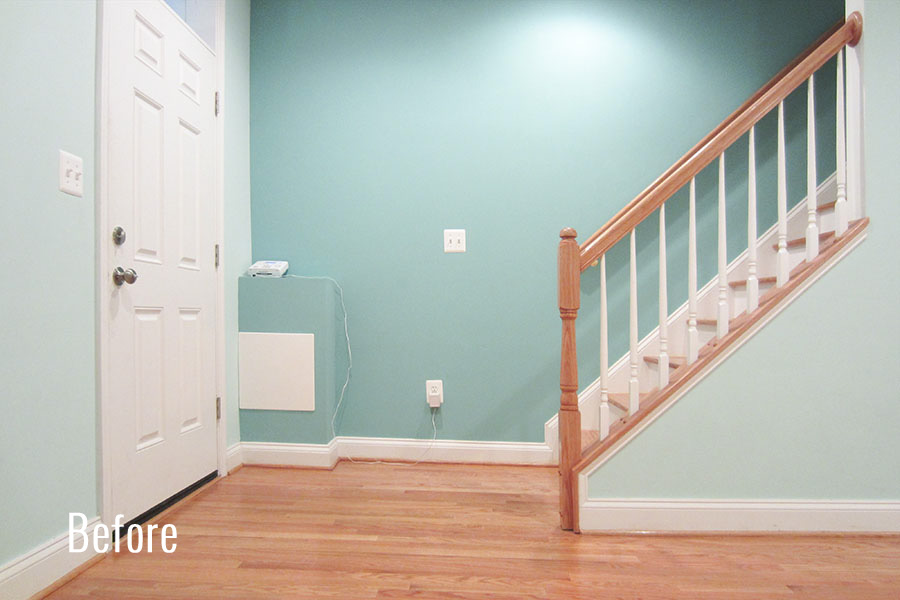

When I got the quote for the floors, I didn't realize the newel posts and handrail aren't automatically calculated into the cost. I could have paid extra for them to be refinished, but I figured why pay more when that’s something I can handle myself? I know what I'll be doing this weekend! Just follow my lead and ignore them for now.


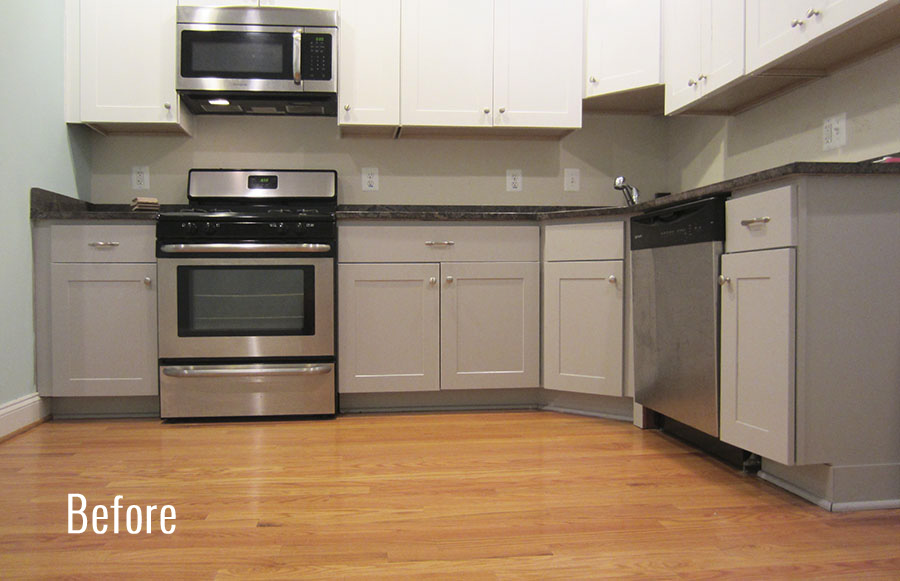
I really love how the color works with the kitchen cabinets we painted back in July. The view down there on the left was the biggest eyesore in the house – I was so elated when we finished painting the cabinets and then so bummed when we pulled up the tarp covering the floors. Without all that shiny orange screaming "LOOK AT ME!" I can fully appreciate our handiwork 4 months later. Plus, I finally feel inspired to install the backsplash and under-cabinet lighting.

The powder room already won the distinct honor of being the first complete room in the house, but today it's looking even better. The previous yellow matched the suns in the wallpaper spot on ... that was definitely not what I was going for! Now this little room feels calmer and more grown-up. It’s still quirky but it doesn’t look like a funhouse or a tanning booth anymore.


Below is the view from the master bedroom. I like seeing this first thing in the morning to remind me that it wasn't a dream – the floors really are refinished :] Those newel posts are mocking me but their days are numbered, and the walls are begging me to hang artwork ASAP.


The darker wood just feels so luxurious... like my feet are getting a little treat every time they touch the floor. Have I mentioned that I love it? I really love it. I chose to go with a satin finish on our redo and I'm so happy with the result. It has this coy sheen that is so beautiful in person.

Okay, so that's enough of the ogling for now. Keep reading if you want to know about the process or cost of getting from A to B. Last week went something like this:
- Sunday (Prep): Eli and I moved our couches, dining table and refrigerator into the laundry room alongside the washer and dryer...our pack-job would get a very high Tetris score. The breakfast nook in the laundry room went up to the guest room, along with the rug and anything else that was breakable. We cleared the kitchen counters and took artwork down from the walls so they wouldn't get covered in dust...the TV stayed up because it's anchored really tightly on the wall and could be covered with plastic.
- Monday (Day 1): I met the 3 floor guys in the morning to let them in and finalize the color. (Word of caution: make sure you specify if you think you want gray, black or white stain as those aren't standard colors that they keep in the truck) They removed the shoe moulding and taped up plastic around anything we wanted to keep dust free (like the kitchen cabinets/counters, built-ins and TV). Then they sanded a section of the floors to put down color swatches. I had picked up a floor sample from Home Depot in the color that I liked (Colfax by TrafficMaster), which made it easier for the guys to match. After we decided on the color, they sanded the entire floor and applied the first coat of stain.

- Tuesday (Day 2): In the morning I went by the house to make sure the color was good before they started applying the poly. It was lighter than we'd decided on, so I asked them to apply a second coat of stain. That added about $0.75 per sq ft to the final bill, but I'm really glad we did it.


- Wednesday (Day 3): The guys applied the first and second coats of poly. I opted for a water-based polyurethane in a satin finish because it dries fast and clear. If we had gone with an oil poly, the floors would have needed a full day between each coat and then more curing time after. Plus the house would have been filled with noxious fumes and the color would have gotten more yellow over time. Oil is the classic standard, but water-based just sounded more appealing to me. Word of caution: My friend Sharon had a bad experience with water-based poly which she later learned was caused by using Murphy's Oil Soap (CORRECTION: An earlier version of this post said it was Mrs. Meyer's hardwood floor cleaner – it's actually Murphy's! My B, Mrs. M). Apparently something about the cleaner interfered with the adherence of a water-based finish... super crazy and unfortunate! I almost never mop and certainly never with Mrs. Meyers, so I decided it was a non-issue for us. I'll let you know how it holds up!
- Thursday (Day 4): The guys applied the third (& final) coat of poly in the morning and installed new shoe moulding. We got home from work around 9pm and did our celebration dance on our new floor!
- Weekend work: I'll be sanding & staining the newel post and handrails this weekend, as well as touching up the paint on our stair risers and caulking the new shoe moulding. Then we'll move everything back to where it belongs and share more "After" photos.
Eli and I stayed with my sister during the refinishing process...technically we could have been back in the house after the first 2 coats of poly went down, but we played it safe and waited til it was all done. One thing I was really nervous about going into the process, was security. There would be strangers in my house when I wasn't home, which is nerve-wracking for me. The guys we hired were fine and didn't give us any reason to suspect they'd steal anything (before, during or after), but we did take some precautions. Eli took his expensive camera gear to his office and we kept our laptops with us. Everything else stayed, including the TV, iMac, jewelry, etc. but other than the TV, we didn't leave anything enticing out in the open.
The other concern was what to do with our house key. It wasn't practical for us to meet them every time they came or went because of city traffic and needing to be at work. I ended up leaving them my key, which was nerve-wracking again...what if they made copies? Or what if they forgot to lock up and someone else broke into our house? These are things I have to think about in our neighborhood where there's a decent amount of crime. Luckily we have a home security system that we can control from our phones and see whenever a door or window is opened. The floor guys called me each morning when they arrived so I could disarm the house, and then again when they left so I could arm it again. I also let my neighbors know what was going on so they could call the cops if anything seemed awry. Thankfully we didn't have any issues, but I just wanted to share what worked for us since I hadn't really considered it beforehand.
Lastly, the bill. I called around and got some quotes before deciding to go with a local company called Atlas Floors. Here's how the bill broke down:
| Sand, 1 coat of stain, 3 coats of poly for main floors | (309 sq.ft.) | $927.00 |
| Sand, 1 coat of stain, 3 coats of poly for stair treads | (103 sq.ft.) | $154.50 |
| 2nd coat of stain | (309 sq.ft.) | $231.75 |
| Discount** | -$100.00 | |
| Total cost | $1,813.25 |
** I originally chose Atlas because my friend had recommended them and they were offering an Angie's List Deal. After I had them come out to measure and finalize the quote, I learned that it was a different company called Atlas that was offering the deal. Whoops. They offered me $100 discount to stick with them, and I took it. I'm still not sure which company my friend used, but it worked out in the end.
$1,800 is easily the most we've spent on anything in our house to date, but it also has had the biggest impact. I'm considering it an early birthday and Christmas present to myself. : ] And an investment in my sanity!
So what do you guys think? Did it turn out like you expected?