DIY Custom Built-In Bookcases

Constructing custom built-in bookcases

When I first launched the blog & a home tour, the project everyone seemed most interested in was the built-in bookcases. I planned to make it one of my first posts and it was no doubt going to rocket me into superBlogdom ;) Yet here we are, 8 months later and still no built-ins -- or superBlogdom, for that matter! Please, please, please forgive me for testing your patience, friends. It’s now been almost a year and a half since we built the shelves – they're twice as old as the blog –  and while I could have sworn we documented every step of the process, most of those photos are no where to be found.... excuse me while I find a corner to cry in.

A handful of photos were miraculously recovered from the ether, and they will have to do. Really the process of designing, planning and building could be split over 2 posts but I like to test the limits of your attention span (plus I simply don't have enough photos to justify more than 1 post). So get excited guys! Lots of words and few photos – I hope you've had your coffee! ;) 

First lets take a look at where we started:

Constructing Custom Built-In Bookcases

We knew the living room was going to be tricky before we bought the house. Eli had a huge TV, and we had a not-huge living room to hide it in. We considered a lot of options but ultimately decided it should go on the only full wall available. That wall was also the only one that could fit a full-size couch but priorities, people! TV > couch. I spent a few weeks looking for a midcentury-style credenza to swap in place of that clearly too-small cabinet, but all the ones I found were too long, too deep or too expensive. Sooo I gave up on that idea and set my heart on custom shelves. Naturally.

Step 1: Design & Plan

I came up with the design by snappin’ an iPhone pic of the wall and bringing it into Adobe Illustrator, where I spend most of my days. I started drawing shelving designs over the picture until something stuck. There were a few fixtures to work around: the TV (obviously), the circuit breaker box (to the right), a vent (top, middle) and a couple electrical outlets. I also figured having lots of different sized areas to fill would give me more options for what to put in them and look a little different from what I've seen on pinterest. More on that in a later post.

Designing and constructing custom built-in bookcases

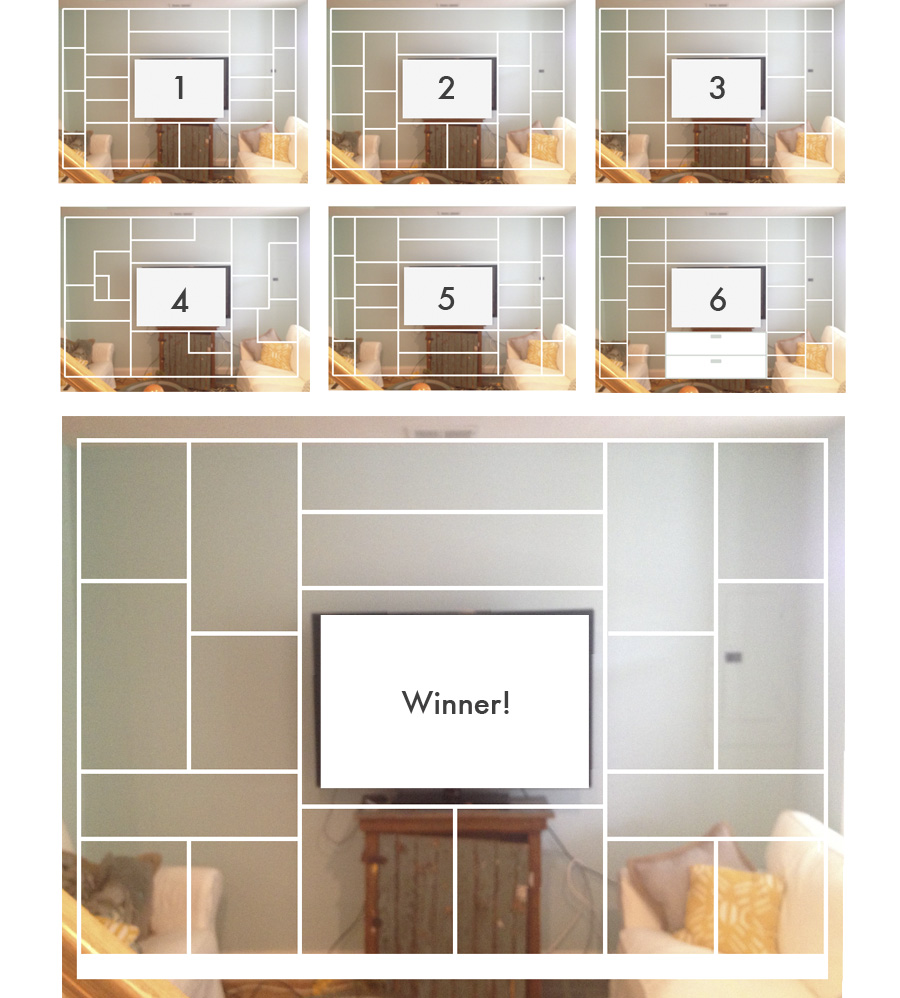
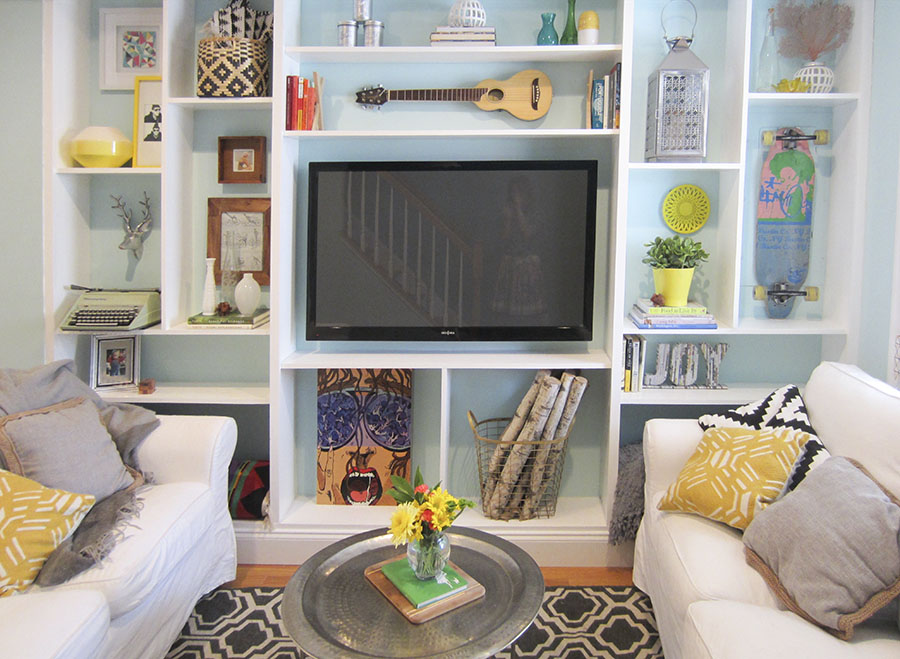
What really sold me on this configuration were the double-wide horizontal cubbies (for lack of a better word) on either side of the TV. They're about even with the sofa arms (more-so in real life), and I envisioned them to serve as end tables since the room is otherwise too narrow for such luxuries. The cubbies themselves are tall enough to comfortably accommodate just about any drinking vessel you might choose... except maybe a wine bottle but get a glass for crying out loud! ;)

So once I settled on this design I measured the wall, measured my fixtures, and did the math to figure out the actual dimensions of my drawing. In other words, I found it easiest to work backwards. From those measurements, we created a lumber list. We pulled up Home Depot’s website to see what our options were and which lengths were most cost effective, and then did more math to figure out how to minimize waste. I was basically Russell Crowe in A Beautiful Mind. I color-coded my sketch by the length of wood that shelf would come from, and it served as our reference throughout the process. If we cut from a 6 foot board when we were supposed to cut from a 12 foot, we’d be left with an unusable amount of scrap and have to go back to the store for more wood. Ya dig?

Designing and building custom built-in shelves

Step 2: Shop

Ultimately we settled on this shopping list: 

  • Seven 1" x 10" x 12' - I think we went with pine
  • One 1" x 10" x 10'
  • One 1" x 10" x 6'
  • Two 2" x 4" x 12' - This is what I wrote down at the time but I'm seriously doubting we needed that much
  • One 12' piece of base molding
  • Two  1" x 2" x 12' piece of pine trim
  • One 1" x 2" x 8' piece of pine trim
  • Two packs of 2" phillips flat head wood screws 
  • One pack of 1.5" finishing nails
  • Wood filler
  • White, paintable caulk
  • 1 gallon and 1 quart of Zinsser Bullseye Primer
  • 2 gallons of Behr Premium Ultra Pure White in Semi-Gloss finish
  • Angled paint brush
  • Small paint rollers

Other than the 2x4s, all the boards were 10” wide (really 9.75”). That worked great for us because the shelves butt up against a wall that juts out 10.25”. After adding the 3/4” thick trim to the shelf fronts, we’d have a pretty smooth transition from shelving to wall. When shopping for lumber we looked for straight boards that didn’t have cracks, holes or tons of knots. To check straightness, we’d bring a board down to the floor, lift one side up to eye level, and squint while looking down the board and rotating it to check every side. If it bowed or had a damaged edge we put it back and grabbed another one. You’ll see in the pictures that the ones we chose weren’t perfect – there are higher quality options out there for a higher price. We went with paint grade, but you’d need a nicer quality if you wanted to stain them. 

We decided against renting a truck to bring the lumber home, so Eli’s station wagon & knotting skills really came in handy. Picture me terrified, clutching the boards from the passenger seat ready to use my she-woman strength at every bump turn and pothole, while insisting at least 10 times that "I should sit in the trunk to make sure they don't go anywhere." I'm sure all that "excitement" only shaved a few days off my life – a small price to pay to save a buck ;)

Constructing custom built-in bookcases

Before I go any further I should clarify – we are not carpenters. We had never built a legit piece of furniture before, let alone something this big, so we just took it slow and figured it out as we went along. I’m sure a pro would have done a better job but I didn't have a few grand laying around to find out. I’d read some tutorials (likes these here & here) and incorporated details from each to get to a final product that we’re mostly very happy with. There are things I would have done differently a second time around, as well as things I still plan to alter, but I’ll save those for the end. This is just one way to do tha dang thang.

Step 3: Construction

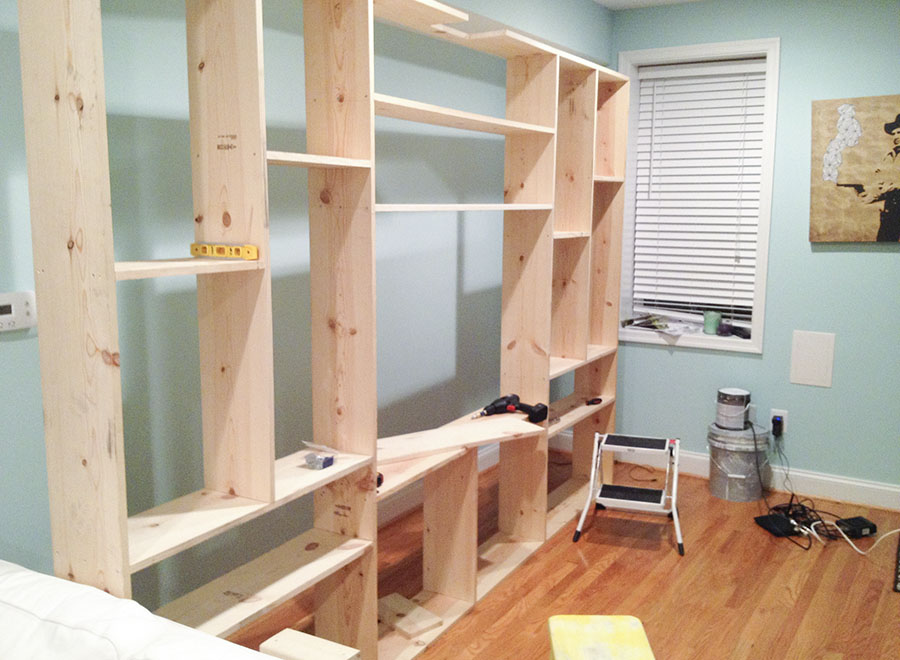
We started by building the outer frame and the full-length vertical boards on either side of the TV – these 6 boards form the supports for the rest of the design. We made our cuts on the back deck with a circular saw and did all of the assembly in the living room –  we didn’t want to risk the shelves not fitting through doorways or causing them to torque and break while navigating the house. We used a level, carpenter’s square and tape measure to make sure the boards were good to go before screwing them together. I held them in place while Eli used his countersinking bit to pre-drill the holes & then screwed them together. We pre-drilled everything to avoid splitting the wood.

Constructing custom built-in bookcases

I wanted to continue the base molding along the bottom, so the height of the shelves is actually measured from the top of the moulding to the ceiling. Then we created base supports out of 2 x 4s to hold them up. These risers are just rectangular blocks that we screwed together and spaced every 16 inches or so  (seen in the top left corner in the above photo).

Once we had the basic frame assembled we carefully slid it onto the supports against the wall to test the fit and breathed a huge sigh of relief when it did indeed fit. 

Constructing custom built-in shelving

Word to the wise: leave yourself a little bit of space width-wise so you can slide the shelves in & out without having to scrape against the walls. We hid that space later. After doing our first little victory dance of this saga we carefully laid the frame baaack on the floor to finish assembly.

 Constructing custom built-in bookcases

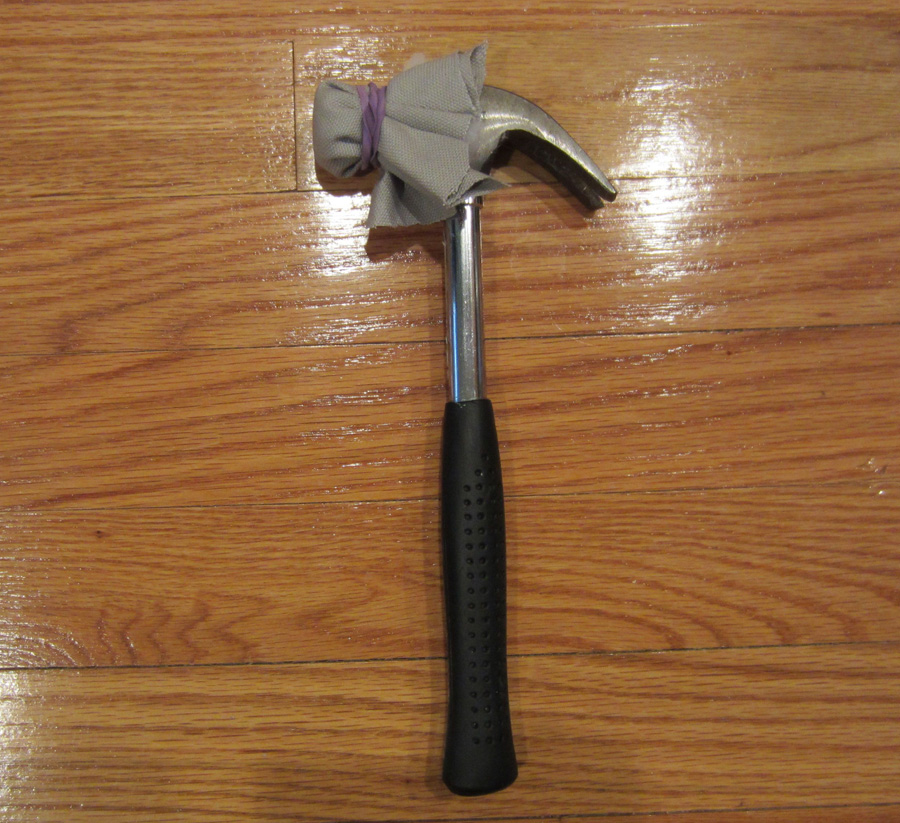
That's me marking the height for the "side table" shelves to fit all your beverage desires. We kept a level & square handy to check our shelves and corners often. 

Step 4: Patch & Sand

By the time we finished assembling there were a lot of screw holes to fill in, plus general imperfections in the wood that I wanted to hide. I'm fairly certain a carpenter would have created pocket holes to do the joining and then fill the holes with plugs, but that was beyond our skill set. 

I ignored everything on the outside of the frame since that would all be hidden against the wall, but all the visible holes got a good dose of Elmer’s wood filler applied with a putty knife. My wood filling photos are MIA, but that's probably for the best. Let’s just say I went totally overboard -- piling on the filler in big heaps & not scraping off the excess before letting it dry. Never again! That stuff turns rock hard, and the small mountains I created for myself were a huge pain in the ass to sand down.

Constructing custom built-in shelving

I used my B&D Mouse sander and went thru an entire pack of rough 80 grit plus another pack of fine 400 grit before it was silky smooth. By that time I'd also turned the downstairs into the Dust Bowl -- every surface was covered in a crazy thick film and it took forever to clean it all up. Next time I’d use less filler, scrape off all the excess while it’s still wet, quarantine the area with a plastic tarp like we did when painting the cabinets, and wear a sanding mask or respirator!

Step 5: Prime & Paint

Given all the dust, I was really careful about cleaning the shelves before cracking open a can of primer. I vacuumed, swept, wiped down with a wet cloth, and wiped down with a tack cloth before declaring the area dust-free. When everything was spick and span I laid down a drop cloth and got to “the easy part”… 

I foolishly thought 1 coat of primer and 2 coats of paint would be enough to get really even coverage but it took more like 2 coats of primer and FOUR coats of semigloss paint. Claw hands 4 lyfe.

I used an angled brush for the corners and a 6” roller for everything else. I did this before we moved the shelves into place so I wouldn’t have to worry about taping off or retouching the wall. 

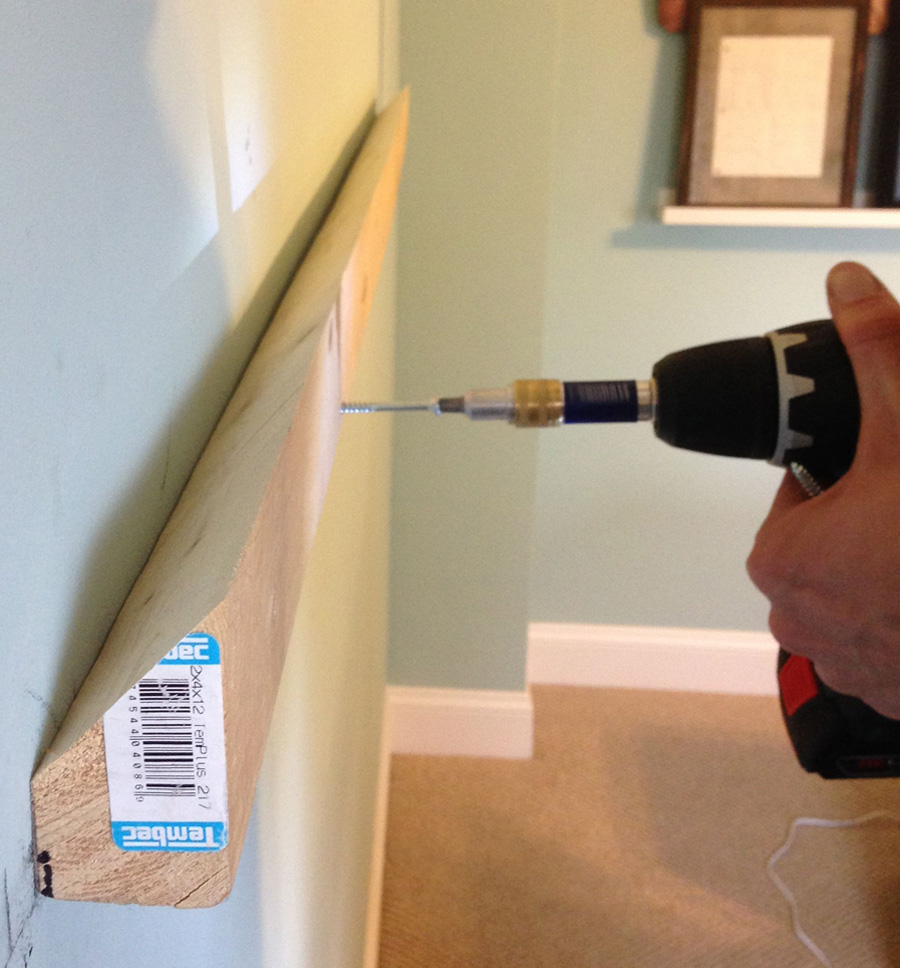
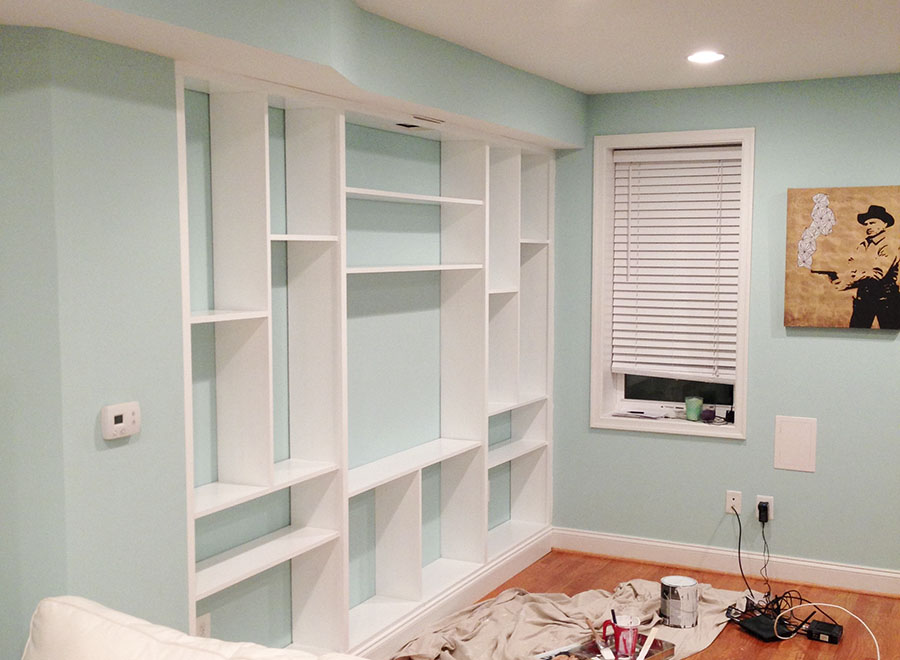
After we were 100% sure everything was dry, it was time to put the shelves in their final resting place. We used a stud finder on the walls that would flank the shelves to figure out where we could anchor them in. Once we had a general idea of where they were we nervously shimmied the shelf to the wall, hoisted it up onto the 2x4 blocks, and secured it in place. We drove several screws thru the sides of the main frame and into the studs. In an abundance of caution we also used small L brackets to lock it to the back wall. This thing still feels super sturdy after 16 months but I haven't been using it as a jungle gym or anything. Of course, after locking it down we had a few more holes to patch and paint, but I was a pro by that time. 

Are you guys still awake? Pat yourself on the back and rest assured that you're almost to the end. The fun didn't stop there, guys! 

Step 6: Trim & Moulding

Walls are rarely perfectly level & we'd left ourselves some wiggle room to get the shelves into place, so there were small gaps here and there that we hid by installing 2” x 1” oak trim with finishing nails. Gaps be gone! I made a controversial decision to only install trim on the boards that ran full lengths… so the outside frame and the two vertical posts on either side of the TV. This gave those edges a nice beefy look, but now that we’ve lived with it like this for a while, I want to add trim to the rest. I'm getting the sense that the wimpy ones are envious of their beefcake neighbors. (Whether I actually get around to doing this is another matter) After the trim was in place, we installed base moulding along the bottom.

Constructing custom built-in-shelving

Step 7: Caulk & Touch-Ups

Caulk was the silent hero in getting the polished, built-in look. We caulked all the seams, edges and little nail holes left from attaching the trim & moulding, and then touched up the paint. It’s a good idea to actually paint over the caulk when it’s dry to make it easier to dust and clean down the line. Those gaps along the back wall in the picture above are suddenly gone in the picture below. Caulk is magic!

Constructing custom built-in shelving

And that's how we built the shelves! If you really want to know, there are a few things I would have done differently and a few things I plan to actually do something about.

What I’d do differently:

  • If we were to do this again I would have removed the base & shoe moulding from the walls behind the shelves. It was helpful to have the baseboards there because we rested the shelves on them while sliding the 2 x 4s in, but it also made it impossible to get a seamless transition from old to new base moulding. Luckily those corners are hidden by the couches, so it doesn’t bother me on a daily basis (just times like now where I’m revealing our folly to the world).
  • The vent above the shelves was inconveniently placed, so we ended up cutting a hole in the top board to accommodate it (fine) and cut a notch in the trim to go on top of it (mistake). We should have created some sort of extension for the vent to  nudge it closer to the wall and then used 1 complete piece of trim across the front to hide it altogether. Doh! Some day when we've fried our bigger fish we'll come back for this guy.
  • Think about what I wanted to put in the shelves. I took a Field of Dreams approach thinking all the pretty things I didn't yet have would find their way to our built-ins if I just built the things, but that has been more of a challenge than I thought. The cubbies below the TV, for instance, are an awkward size. I thought maybe some pretty baskets could sit there and hold extra blankets and pillows, but i's a pretty shallow shelf for a wide and tall basket. One thing I definitely plan to change is to add doors to at least some of the bottom cubbies...either those middle ones, or the outside ones, or both. I haven't decided the specifics yet, but it will happen!
  • Already said this but will say again -- trim on all edges! I liked the varied look at first, but now I wish they were all thick and substantial looking. Plus those trimmed edges just look smoother in person.

I think that's it. Like I said, they aren't perfect but we're very happy with them in general. At some point I'll finally get them styled to my liking and then really rejoice! What do you guys think? Would you consider building your own wall of shelves? 

Effortless Wood & Leather Picture Frame

A super easy DIY picture frame made from suede cord and wood slats

Despite the laundry room's snazzy gallery wall, the powder room's funky wallpaper, and the living room's huge set of unstyled built-ins, I still feel like most of my walls are a desolate wasteland crying for help art. I guess that's as good a sign as any that I'm no minimalist.

There are a few reasons my walls are still bare – primarily a lack of art and a lack of frames. Go figure! Owning a house has suddenly made me very picky about what I put on the walls, and the filler from old apartments won't do anymore. I'm not trying to start a highbrow art gallery here, I just want a well-appointed collection of pieces that make me smile when I pass by. Is that so much to ask??!

As it turns out, it’s really hard to find good artwork that doesn’t cost gobs and gobs of money. Hence the filler and the empty walls. And more surprisingly, it's hard to find matted frames in stores that fit what I want to hang. Hence the lucrative industry devoted to custom framing. This is all to say that I've set off on an art-gathering, frame-making mission – and I'm starting simple with this majestic Rifle Paper Co. calendar cover and a (seriously) effortless frame. (Can we call it a frame? Cuz I am.) But before we get to that, I just gotta say I am in love with all things Rifle Paper Co. right now! The colors & illustrations are so charming and girly. "Girly" isn't my usual aesthetic & a calendar cover isn't my usual idea of "art," but I love this one & it makes me smile, so up on the wall it goes!

OK, back to the frame. This beaut is ridiculously easy – there are probably thousands of them hanging in ancient caves yet to be found by archaeologists. All you need is:

  • Something you want to frame – ideally on a thicker material (like cardstock or unstretched canvas)
  • 1/4" x 3/4" flat screen moulding – the length should be 4 times the width of your image + breathing room. For me, that was about 4 feet.
  • Suede cord – you can find this at any craft or jewelry store. I recommend flat cord rather than round because it's easier to tie. The length should be about 5 or 6 times the height of your image (better to err on the longer side). For me that was about 9 feet.
  • A saw – I used an $8 miter box saw from Home Depot. This thing is a life saver.
  • Wood stain – I used leftover deck stain in Cordovan Brown, but you can get tiny test pots of interior stain for $3 or $4
  • Paint/stain brush
  • Scotch tape
Step 1 is to measure the length of wood needed for tops and bottoms of this simple frame.

Step 1: Measure your first cut

I carefully tore this cover off my calendar and started by laying the wood across the top. I eyeballed the width, leaving about an inch of wood overhang on each side to give me space for my leather ties. I didn’t need that much space, but I like having the flexibility to swap in larger artwork down the line. If you prefer a more precise fit, a half inch would likely work.

I cut the wood for this simple frame using a miter box back saw set, found at Home Depot for $15

Step 2: Cut 4 wood slats

I used a miter box saw to make my cuts – to clarify, that's the yellow contraption with the slits in it & the back saw. We have 3 power saws in the house, but this school-bus-lookin'-get-up is ideal for accurately cutting trim & moulding. The bottom of the box has a lip that hugs the edge of the table, making it easy to keep it straight. Then you just slide in the wood, brace it against the side of the box and saw away. It takes a little more elbow grease than a power saw, but you reap what you sow. A precise, square edge! I used the wood from my first cut to measure three more – giving me 4 total.

I stained the wood using leftover Behr Deck Waterproofing Stain to get a rich brown color

Step 3: Stain the wood

This is totally optional, but I prefer a warm brown tone over the raw pine. I used leftover deck stain, which isn't ideal for this type of project because it's got a different consistency for weatherproofing. Ideally I would have had a small test pot of interior wood stain on hand, but  #rockwhatyagot! I laid my wood out on a paper grocery bag, brushed on the stain, let it sit for a few minutes, and then wiped it off with a paper towel. I did this a couple times, letting it dry for a few minutes in between coats, to layer on more color until I got the richness I wanted. I only stained the fronts & sides of the wood – not the back – and I let it dry overnight so as not to accidentally stain my picture.

Attach the wood to the picture with some scotch tape and leather cord

Step 4: Assemble the pieces

Once the wood dried, I laid a piece face down and lined the top of my picture to be just below the top edge of the wood and horizontally centered. Once it was positioned, I used a couple small pieces of scotch tape to keep it in place. This saved me the headache of having it shift around while attaching the other pieces. Then I lined up a second piece of wood on top to make a picture sandwich and broke out the suede cord to tie it all together.

I used suede cord to fasten the wood slats around my picture.

Starting on one side, I tightly wrapped the cord around both pieces of wood a couple times and made a knot. Then I gave the cord enough slack to hang from and knotted the other side the same way. I put my knots as close to the paper as I could to ensure a really tight grip on it. This sucker is locked doowwwwwwn. (Said like Will Smith in Hitch after he drank too much Benadryl)

My plan was to cut the cord after each knot, but plans are boring – I like to shake it up! While I was laying everything out I realized I liked the look of leather running down the sides to visually complete the “frame.” It makes it look more meaty & modern, less like an ancient scroll that may disintegrate at any moment.

I placed the bottom two pieces of wood just like I did with the top – taping the picture to the base and then lining up the front piece. I ran the cord down the length of the picture, wrapped it around the bottom pieces of wood a couple times and tied a knot. Then I ran the cord back up, wrapped it once again and tied another knot. I didn't do any fancy sort of knots – just whatever got the job done. Remember, effortless is the name of the game here. The only tricky bit in this entire project was making sure these side cords weren’t tied too short (making the paper billow) or too long (lookin' like a dangled mess). I found the easiest way to test the length was to gently pull the top and bottom pieces of wood in opposite directions, fully extending the picture. *clears throat* I mean, I ran it through my gravity simulator and computed the results to 1/1000000000th of a micron thus fully accounting for the Earth's rotational effects on the last Monday of the 11th month of 2014 and the fibers and #science.... right. So we're clear now... moving on!

A close up of how I knotted the suede leather cord

My suede cord came in 2-yard increments, which was enough to tie the tops and one side. I started with a fresh piece of rope for the other side, knotting it at the top, repeating the process of running it down the side, tying it at the bottom, and running it back up. Above is a close up of the knot on that second side. Super precise, right? And ba-da-bing-ba-da-boom! Finito!

An effortless suede & wood frame DIY

I love when things that look effortless actually are effortless. Unlike my messy-but-not-too-messy "bedhead" today. I did this entire project one night after work (+ some drying time for the stain), and now my "items to hang" pile is one piece shorter. Phew!

What's your process like for hanging things on the wall? Do you just put up whatever you have on hand or meticulously collect and plan every last nail? Would a calendar cover make the cut in your house? That last question is a trap... ;) 

How to Build a West Elm Knock-Off Upholstered Headboard

How to build a West Elm knock-off Upholstered headboard with decorative nailhead trim

When I started telling my friends that we bought a house, the most common reaction was, “Whoa – you guys are grown ups now.” Nay, friends! I didn't become a grown up until I got a real headboard and solid wood bed frame (that you can look under and not find my old ballet shoes and Pink Floyd tees).

I’d been eying this beauty from West Elm for a while, but like I said – I wasn’t quite a grown up (or fabulously wealthy) yet so I just didn't feel OK forking out $600 for a headboard or $350 for this bed frame. It's no wonder my generation still uses metal bed frames that you have to hide under a bedskirt. You can pay a grand after taxes to get the bed of your dreams, or you can pay $10 to the grad student on Craigslist for a bed that serves the same purpose! 

What is a bed frame & headboard other than some wood screwed together, really?! (I learned it’s a little more than that ... foreshadowing ... ) So I decided we'd build that dream bed for less than $200, or my name isn’t Chloe Joy. I took to Pinterest, which is in no short supply of upholstered headboard tutorials – the hard part is choosing which one to follow. They all look something like this: 

1. Cut wood ,   2. Cover with something cushiony ,    3. Add fabric

Other things to consider include: desired shape, cushion material (foam or batting, or foam + batting), type of fabric, decorative details (like tufts or nailhead trim), and installation method.

Here's what I used:

• 1 sheet of MDF – 4 ft. x 8ft. x 5/8" thick board cut to 63 inches wide x 40 inches tall – $35
• 2 in. x 4 in. x 6 ft. – $3
• 1.5 in. wood screws – $7
• 3 in. wood screws – $9
• 10 yards of polyester batting – $15
• 2 yards of duck canvas fabric – $14
• Staple gun & staples – $21
• 15 yards of nailhead trim (in antique gold finish) – $45
• Rubber mallet (or a jerry-rigged version – more on that later)

Step 1: Tape your desired shape on the wall

Step 1: Use tape to decide on final dimensions for your DIY headboard

The West Elm headboard I chose is a simple rectangle – hardly a coincidence. I knew it would make my life easier when building it, and it had the added bonuses of being a little more masculine and unlikely to go out of style any time soon. Even with a simple silhouette, it helped to outline the shape on the wall above my bed with painters tape. This allowed me to fiddle with the dimensions by moving the tape up or down until I felt like the proportions were right. I relied on the West Elm specifications for queen-sized headboards to determine it should be 63 inches wide, which leaves an inch or so of overhang on either side of your mattress. As for the height, Eli and I took turns sitting on the bed and pretending to lean back on our "headboard" to make sure it was a comfortable height for both tall and not so tall persons to rest their heads. 

Step 2: Create the frame

I picked up a 4 ft. x 8 ft. sheet of MDF from Home Depot and had them cut it to be 63 in. wide. If I'd been smarter I would have written down both the width AND height and had the guys cut it to spec. Alas, I had to pull out the circular saw and sawhorses to finish my cuts when I got home. From the leftovers, I cut 4 additional pieces – one for each edge of the frame – that I then screwed to the main board with 1.5 in. wood screws, making the outside edges flush. This gives the illusion of a thicker, more substantial hunk o' wood when you catch a side view of the headboard but it doesn't add much extra weight or $$.

Step 2: Create a frame for your upholstered headboard and add a French cleat

Step 3: Prep your hanging mechanism

A French cleat is attached to hang the DIY upholstered headboard

I decided we would hang this headboard on the wall with a French cleat instead of trying to attach it to the bed frame. Gotta come clean here – I had no idea what a french cleat was before this project. Turns out it's a rudimentary way to hang heavy things, like cabinets or headboards. We cut a 2 x 4 x 6 down to 5 ft. long – a few inches shy of our headboard's width – and then halved it longways at a 45 degree angle. Our circular saw has an adjustable blade that can be tilted to make cuts on an angle. We carefully cut this angle down the entire length of the board. This gives us two long pieces of wood that fit together like a puzzle....or like a french cleat. We attached one half to the back of the frame (same side as the other scrap pieces) and the other half would be attached to the wall later. Notice that the 2 x 4 comes out further than edge pieces of MDF. If you decide you want to make your headboard much thicker than mine,  just make sure that the 2 x 4 will reach the wall before the back of the headboard does when you go to hang it. Our MDF was 5/8 in. thick, so we used 1.5 in. long wood screws and made sure that the pizza slice edge pointed down and away from the frame. I tried to make sure this board was level, but it was tricky because the 2 x 4 wasn't perfectly straight to begin with and I knew I could make small adjustments when positioning the other piece on the wall.

Step 4: Add batting

Many tutorials suggest using foam for cushion, which is certainly the higher quality choice, but I was going for cost effectiveness here. A big piece of thick, high quality foam could have cost anywhere from $60 to $160, whereas this large roll of batting only cost me $15. To compensate, I used six layers of it. You heard me right – SIX! I rolled the first layer out on a clean rug, laid the frame facing down, and wrapped the batting around the edges, stapling it to the back. It gets harder with each subsequent layer to find space to staple...and harder to staple through all the batting into the actual frame. Hindsight is 20/20, so I suggest stapling your first layer pretty close to the frame's edge (meaning there's very little overlap on the back), trimming the excess, and making each additional layer reach a little further than the last, with a slightly bigger overlap on the back of the frame. Make sure the batting is pulled taut across the front of the frame to create a smooth surface – check the front occasionally for bunching.

Corners get especially bogged down with batting on the back, so I ended up cutting into them at a 45 degree angle to thin most of it out. 

Step 4: Attach batting to your headboard frame to create a comfortable base
I used Soft n Crafty batting for the upholstered headboard 

Step 5: Attach your fabric

The West Elm headboard is in a really beautiful dark gray linen weave. I chose a much cheaper, readily available alternative: duck canvas. I only needed 2 yards and it was on sale for $6.99/yd at Joanns. This was my first attempt at making a headboard, so the durability and affordability of the fabric gave me piece of mind that if I totally botched it I could start over without wasting a ton of money. It all worked out, though and I'm still perfectly happy with how the canvas looks and feels.

The rug I'd been using as my work surface was clean, but I layered a freshly laundered sheet over it to feel 100% confident I wouldn't be getting shmutz on my new headboard. Then I laid out the canvas and actually ironed it on the floor. You really don't want to be looking at the same wrinkle above your bed for the rest of eternity. 

Step 5: Attach the fabric to the upholstered headboard with a staple gun

I followed the same process for attaching the fabric that I did with the batting – lay the frame facing down, pull the fabric around the edges and staple to the back. That makes it sound easy, so let me clear my conscience here and tell you it was NOT. Eli had gone out of town by this time, and I was too impatient and cocky to wait for him – figuring I was plenty strong and skilled to do it on my own. Luckily I was right (Girl Power!) but it was not as easy as the tutorials made it sound. You really have to be careful on this step – making sure to keep your fabric straight and pull it really taut, so that you don't get wrinkles or bagginess. I struggled to pull the fabric hard with one hand, lift the headboard with the other to check all was well and good on the front side, lay it down again without messing it up, keep pulling the fabric with that one hand and fire the staple gun with the other. Sure, it's fun to impress yourself, but it's more fun to have a friend help so you don't have to shout obscenities to an empty room.

I started by stapling in the middle of one edge, then hopping over to the opposite (parallel) edge to pull the canvas taut and staple in the middle again. Then I'd work my way out from the middle on those two sides, hopping back and forth, before repeating the process on the remaining sides. 

When I got to a corner, I stapled one edge completely smooth, trimmed the excess and then carefully folded the other side over it to create a nice smooth appearance from the front, top and side. Luckily no one will see the hack job on the back ;) 

Step 5: Pay extra attention to the corners when attaching fabric to your upholstered headboard
Step 5: The corner looks pretty bad on the back side, but is smooth and folded on the front.

Step 6: Install nailhead trim

If you want, you could stop here and have a totally acceptable upholstered headboard. I would have if West Elm's geometric nailhead trim hadn't hypnotized me. I ventured ever so slightly from their pattern, sketching my own on paper before laying it out on the headboard. 

Step 6: Lay out the nailhead trim for your upholstered headboard in the design you want to achieve
I used Dritz Home nailhead trim in "antique gold" purchased on Amazon.
Instead of buying a rubber mallet, I jerry-rigged a hammer using batting, canvas and a rubber band

I ordered 15 yards of Dritz Home nailhead trim in antique gold off Amazon, but only used 12 or so. This stuff is amazing, because as you can see in the top picture, it's just a long strand of metal that looks like individual nailheads. In reality, you only have to bang in a decorative nail every 6th one or so. I'm all for things that look more complex than they are. It's highly recommended that you use a rubber mallet for the banging, so you don't dent or scratch your pretty nailheads. I, however, did not see a rubber mallet at my local store and was still feeling antsy/impatient/cheap. Instead I just jerry-rigged a "gentle hammer" by stuffing a big wad of batting on the head, covering it with a canvas scrap and tying it together with a rubber band. #MacGyver

I really made a rookie mistake on this step (but I later forgave myself since I was in fact a rookie). I started hammering in the nailhead trim along the top edge first. Do yourself a favor and start somewhere that will be covered by your mattress or pillows or pretty much anywhere except the most visible spot. It took me a while to get the hang of the trim, so my lines were wobbly to begin with. I considered removing them and starting over, but that would have damaged the fabric so I just forged ahead. I didn't get the factory-straight lines I was hoping for, but I just try to ignore and/or embrace the imperfections.  

Step 7: Hang the headboard

To hang the headboard level, we taped the second half of the cleat to the first half and held the headboard up to the height we'd marked with our tape. One of us (Eli) kept holding it in place while the other (me) marked where the cleat should go on the wall. We did it this way because of the less-than-perfectly-straight nature of the 2 x 4. We didn't want to hang the board level and then find the headboard was all wonky.

Step 8: Attach the other half of the French cleat to the wall to hang your upholstered headboard
Step 8: Use a level to make sure you hang the headboard correctly

We marked our studs, drilled pilot holes through the 2 x 4, and then secured it with 3 in. wood screws. Our studs are 16" apart and our 2 x 4 was 60" long, so we were able to attach it to 3 studs. Feeling confident in that sturdiness, we hung the headboard on the cleat, et voila!

We are very happy with our new headboard!  Especially since it only cost us about $150 and approximately 12 hours.

DIY tutorial for building a West Elm knock-off upholstered headboard with decorative nailhead trim

You guys know I'm always gonna keep it real with you. When I finished hammering the last nail, my arms were tired, my back was sore, my fingers were raw, and I realized why it costs several hundred dollars to buy this from a store. $600 still feels very steep to me, but now I could see myself paying $350 or so for an intricate headboard with perfectly straight lines. That being said, it would have taken me another year or so to pull the trigger and my bedroom is feelin' much more sophisticated now. In a future post, I'll finish the bed saga and show you how we got a solid wood bed frame for $FREE.99 !

Have you ever built an upholstered headboard? Was it easier or harder than you expected? Anything you would have done differently? 

How to build a West Elm knock-off upholstered headboard with decorative nailhead trim