Simple Faucet Fix That Saved Us $600 in Plumbing

Simple faucet fix that saved us $600

That sounds like the subject line of a spam email if I’ve ever seen one, but I swear it’s true! Back on the eve of Christmas Eve, Eli discovered water spilling out of the cabinet under the kitchen sink and onto our beautiful new floors...cue panic. Santa must have known this was *just* what we hoped for the night before we left town. There was no time to fix it, so we turned off the water supplies (to the sink and to the rest of the house), and we hoped for the best. When I got home about a week later, I found a plumber thru Angie's List who didn't charge the usual $75 or $100 to come give an estimate, and I thought, "Cha-ching!" In hindsight, this might have been a red flag. 

The plumber turned the water on aaaaand....nothing. No leak. Isn't that how it always goes? You've got a problem until you're standing in front of someone who can actually fix it? Ugh. After almost an hour of him "looking," I pulled a "mind if I take a peek?" and literally found the water in 30 seconds. Granted it wasn't a lot of water like it had been the week before, but I should have known at that point that he was a crappy plumber (pun intended). Regardless, I just wanted him to fix the sink so I could get the kitchen back to normal... that was until he said it would cost $630. *record player screech* Say whaat?!

He said we'd have to replace the faucet, and his quote included $255 for the one in his truck (not a great price, but whatever) and $375 FOR LABOR. Now, I'm no plumbing expert, but that sounded really high. Why so much for a simple faucet swap?

Simple faucet fix that saved us $600

Well, he complained a whole lot about our little corner sink and insisted on removing the garbage disposal to reach the faucet behind it and then reinstalling the disposal. No disrespect, but this sounded like a personal problem to me. A more nimble person could probably get in there fine without removing the disposal and inflating the price... like Eli nimble... 

(Please ignore the messy counters...leaky sink)

(Please ignore the messy counters...leaky sink)

I told the plumber, "thanks but no thanks," and that I would shop around for a cheaper, nicer-looking faucet. I mean honestly, if I have to replace a faucet that never bothered me to begin with, it sure as haayyyyl better be a stylin' upgrade! Plus, the leak had dissipated for whatever reason, so it didn't really qualify as an "emergency" anymore and could wait for Eli to take a look.

Now, let me stop for a moment to clarify – I'm not suggesting every plumbing problem is a DIY or that plumbers aren't worth the money they cost. We hired a plumber the first month we lived here because water was leaking from the upstairs shower and coming through the recessed lighting in the kitchen. We paid a little more than $400 for a plumber to fix it, and it was money well-spent. What I AM saying is to trust your gut. If a plumber can't show you the problem and explain exactly what is causing the leak, or he gives an estimate that seems disproportionate to the size of the problem, OR you have nothing to lose by tinkering on your own, then you may want to consider telling that plumber to bugger off. You can call another one to get a second opinion or try to fix it yourself... we chose the latter and thank god we did. It was ridiculously simple AND free! Here's how Eli fixed it.

Step 1: Follow the water to find the source

The plumber guessed the leak was coming from a plastic piece that was not sold separately, thus the need for a new faucet. He was wrong. Eli keenly noticed a dark ring on the underside of the granite counters that looked a lot like water  β€“ an indication that the problem was likely above the sink. Smarty pants. We had often noticed water around the faucet while doing dishes but assumed it was just from splashing. Not so! Upon closer look, Eli found some leakage at the seam where the handle rotates. Ding, ding, ding, ding, ding!

Simple faucet fix that saved us $600

Step 2: Turn off the water

Before we started dismantling the faucet we had to turn off the water using the knob under the sink. For a brief moment we considered skipping this step and transforming the kitchen into a slip'n slide. Maybe next time... ;)

Simple faucet fix that saved us $600

Step 3: Remove hot-cold indicator

Our faucet doesn't have any branding or insignia so I can't tell you with certainty who made it, but to disassemble it we first had to pry off the little indicator that says which way is hot and which way is cold. A flat screwdriver did the trick without scratching the finish.

Simple faucet fix that saved us $600

Step 4: Remove the handle

Eli used an allen wrench to loosen a set screw the lives inside that hole. Then he removed the handle and the cap it rests on.

Simple faucet fix that saved us $600

Step 5: Loosen retainer nut

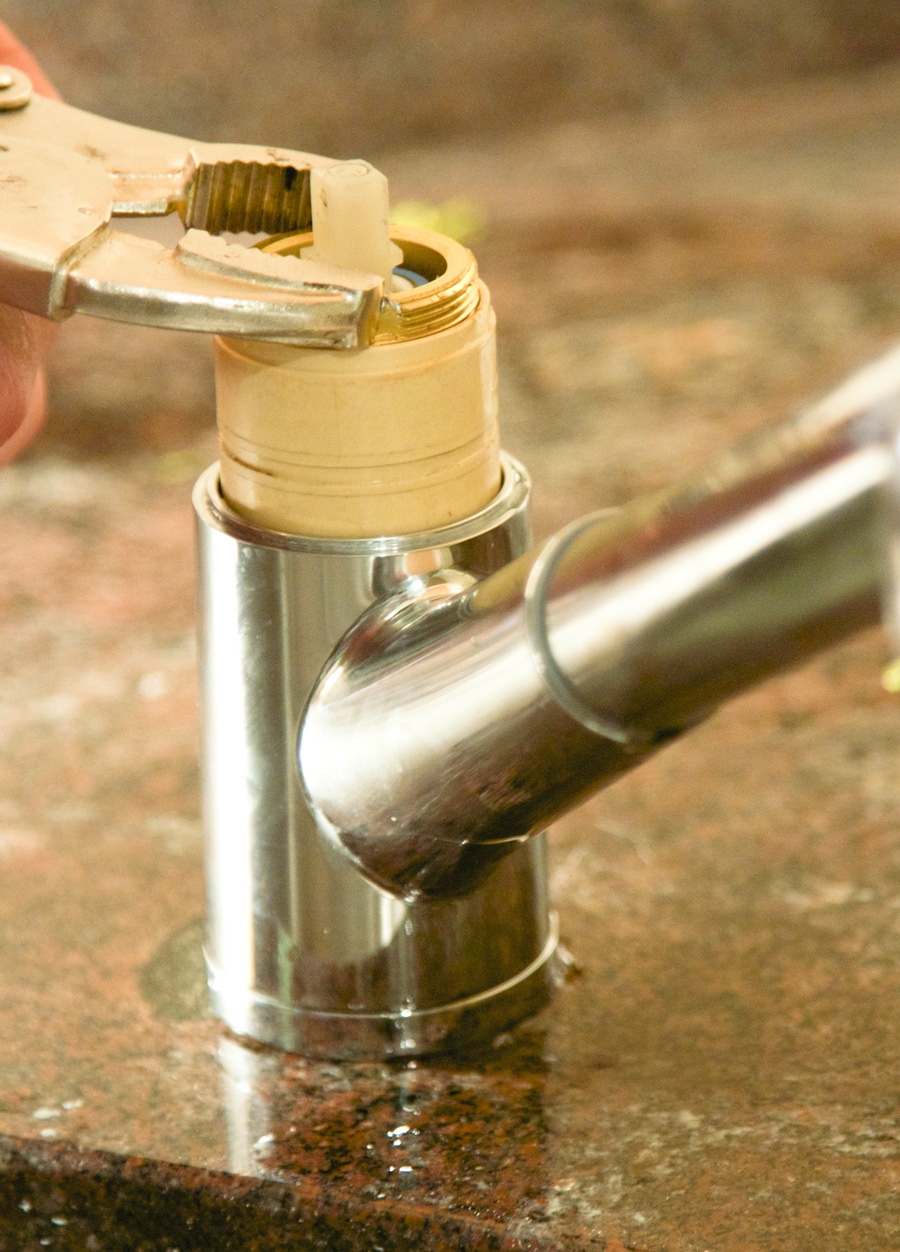
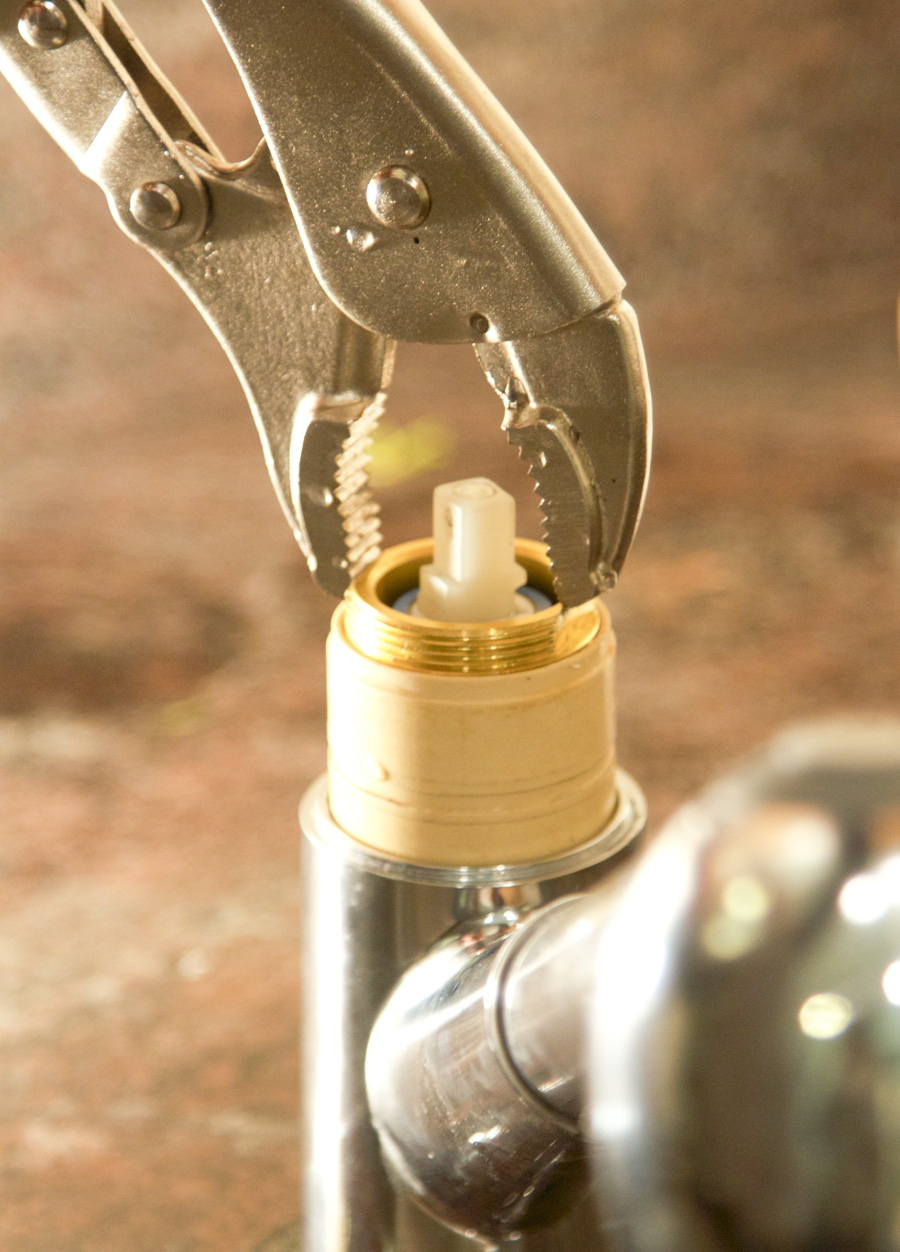
He used a vice grip to unscrew the gold retainer nut, but a big adjustable wrench would have been better. The vice grip can easily chew up the threading, so he had to be careful with that. 

Simple faucet fix that saved us $600

The gold retainer nut is what holds the blue hot-cold cartridge in place. The cartridge is where hot water is mixed with cold to give you whatever temperature you're going for. We knew NONE OF THIS before taking everything apart – sinks are fascinating! 

Simple faucet fix that saved us $600

Step 6: Ensure cartridge is properly aligned

The rings on the bottom of the blue cartridge are supposed to line up with similar rings on the beige valve gasket, and the water flows through them. In our case, the gold retainer nut that was supposed to keep them aligned was not properly tightened down, so every time we turned the faucet handle we loosened the nut a little more and weakened the seal. Without a tight seal, the water was spraying inside the faucet and leaking down through the base. We found the leak!

Simple faucet fix that saved us $600

Step 7: Tighten it down

To fix it, Eli just lined up the cartridge with the valve gasket and tightened down the retainer nut to keep them in place. This took a little bit of adjusting β€“ make it too tight and the handle is really hard to move, make it too loose and the sink will leak again. Eli got it just right, so the handle is harder to move than it was, but not so difficult that it's annoying.

Simple faucet fix that saved us $600

Step 8: Re-assemble the pieces

All that was left to do was put it back together...play that tape in reverse! He layered on the cap and handle, tightened the set screw with the allen wrench, and popped the hot-cold indicator back on. !moob-adab-gnib-adaB ...... Bada-bing-bada-boom! 

Simple faucet fix that saved us $600

Our sink is back in working order, our floors are safe, and our wallets are full. Well not full, but you know ... less empty than they would have been. Eli's penchant for taking apart things he knows nothing about really paid off! ;] 

Would you guys have risked it? Any other plumbing saves we should know about? 

Milestones from 2014, Resolutions for 2015

happy-new-year-2015.jpg

Is it just me or does every year go by faster than the last? This one flew by but the ride was pretty great – thanks in large part to the resolutions I set last year to β€œbecome a morning person” and to start this blog. I mean, realistically speaking, it’s gonna take years for me to naturally jump out of bed before the sun is up, but working towards that goal has certainly had an impact. Most days in 2014 started 3 WHOLE HOURS before I had to be in the office – this from the girl who would usually sleep until the last… possible… minute... (β€œand there went my bus”). All that new-found time allowed me to design, write, edit, craft, and photograph for the blog – which was far more rewarding than extra ZZZs. Getting to interact with y'all has been nothing short of wonderful, so THANK YOU for reading and asking questions and sharing your opinions and experiences! You've made this year truly special.

Since last New Year's goals turned out so great, this year I’m setting bloggy goals, house goals, career goals, physical goals, emotional goals, financial goals β€¦ you name it, I’m goalin’ it. Who says we should settle for just one?! 

But before I go dreaming up my ideal 2015 I wanna take a moment to look back and appreciate what Eli & I accomplished in 2014. I'm always thinking about the next thing and what still needs to be done, and I often forget that we've come a long way already in just one year. So, without further ado, the biggest house changes in 2014:

1. We painted the kitchen cabinets

This was by far the biggest project we tackled, and Eli got it all on video to share with you guys.  

2. We refinished the floors

As suspected, our sexy dark floors totally transform the look of the house.

3. We wallpapered the powder room

The bold geometric pattern puts the β€œPOW!” in powder room. Naw mean? And this room gets bonus points for being the first one finished!
4. We built a headboard and grown-up bedframe

We graduated from Ikea Hacks to West Elm Hacks, y'all. I upholstered a headboard to look pretty damn close to this one from WE, and Eli found a *free* WE platform bed frame on Craigslist that he converted to hold our box spring

5. We created a breakfast nook in the laundry room

It’s easy to forget that this time last year the laundry room was just for laundry. Now it's my go-to spot for eating breakfast, enjoying a cup of coffee, and writing my next blog post.

6. We stained and sealed the deck

Step 1 for "Pimp my Porch" completed, with a video to boot. Summer soirees here we come. 

7. We installed a medicine cabinet

And found a window inside the wall…which still has made me wondering what else is behind these walls. I mean, hellooooooo, there could be treasure!!! But for now I'm content just to have the toothbrushes hidden. 


Well that was a fun little victory lap! I usually just collapse at the finish line. Here I was feeling like we are sooo farrrr from finished, but we really are so much closer than we were! Eli is doing a celebratory dance cuz he thinks that means we're done. We're certainly not, but every project is forward progress. To steal a clichΓ© from the blogosphere – transforming a home is a marathon not a sprint. How many more running analogies do you think I can fit in one post?

So what’s in store for next year? Hopefully a lot of really spectacular, awesome, highly superlative things. I think we can accomplish even more than last year by planning things out a little better, but my top 5 priorities are: 

1. A living room refresh: Our Ikea loveseats' days are numbered. I'm shopping for sofas and chairs as we speak and devising a plan to add closed storage to the built-ins. 

2. Light fixtures: I've got a few great ones that have been laying around for months – it's time to hang them already!

3. Natural light: Before buying a row house I didn’t fully appreciate the value of windows and sunlight – silly me. The lack of light has been my nemesis! This year I want to get new exterior doors with windows, and I want to open up the skylight that was mysteriously covered by a previous owner. 

4. Tricking out the guest room:  It's more like "the junk room" right now – it's embarrassing. We need to build a proper bed (with storage!), configure the office, and *brownie points* if I can make it work as a studio for blog photos, too.

5. Back yard reno: Last spring & summer were not so productive in the yard department. This year I want to get serious about making it more useful and beautiful. 

That should keep us busy for a little while, yeah? :) What are you guys hoping to accomplish in the 2015? Anyone else setting multiple goals? 

My favorite home projects from 2014

Refinishing the Stairwell

 
How to refinish a stairwell

Happy Friday, friends! Today is my birthday – I’m a quarter of a century old and really excited about what the next year holds! I don’t know yet what’s in store, but I have a very distinct feeling that it’s going to be wonderful. Before I tell you about this week’s house project, let me throw out an idea.…an invitation, even. I, Chloe Joy, invite you to send me your problems. Preferably the house/design/DIY variety cuz I don’t know much about cars or babies or psychoanalysis. Got a room that’s driving you nuts? Need a second opinion on paint colors? Not sure where you’re gonna store your holiday decorations? Tell me about it (no, really)! I would love to help if I can, so send me your question to chloejoy@littlehousebigcity.com (or by filling out this contact form) and include pictures if relevant. I think it would be fun to feature these Q&As here once in a while, what do you guys think?

And now back to our regular programming…

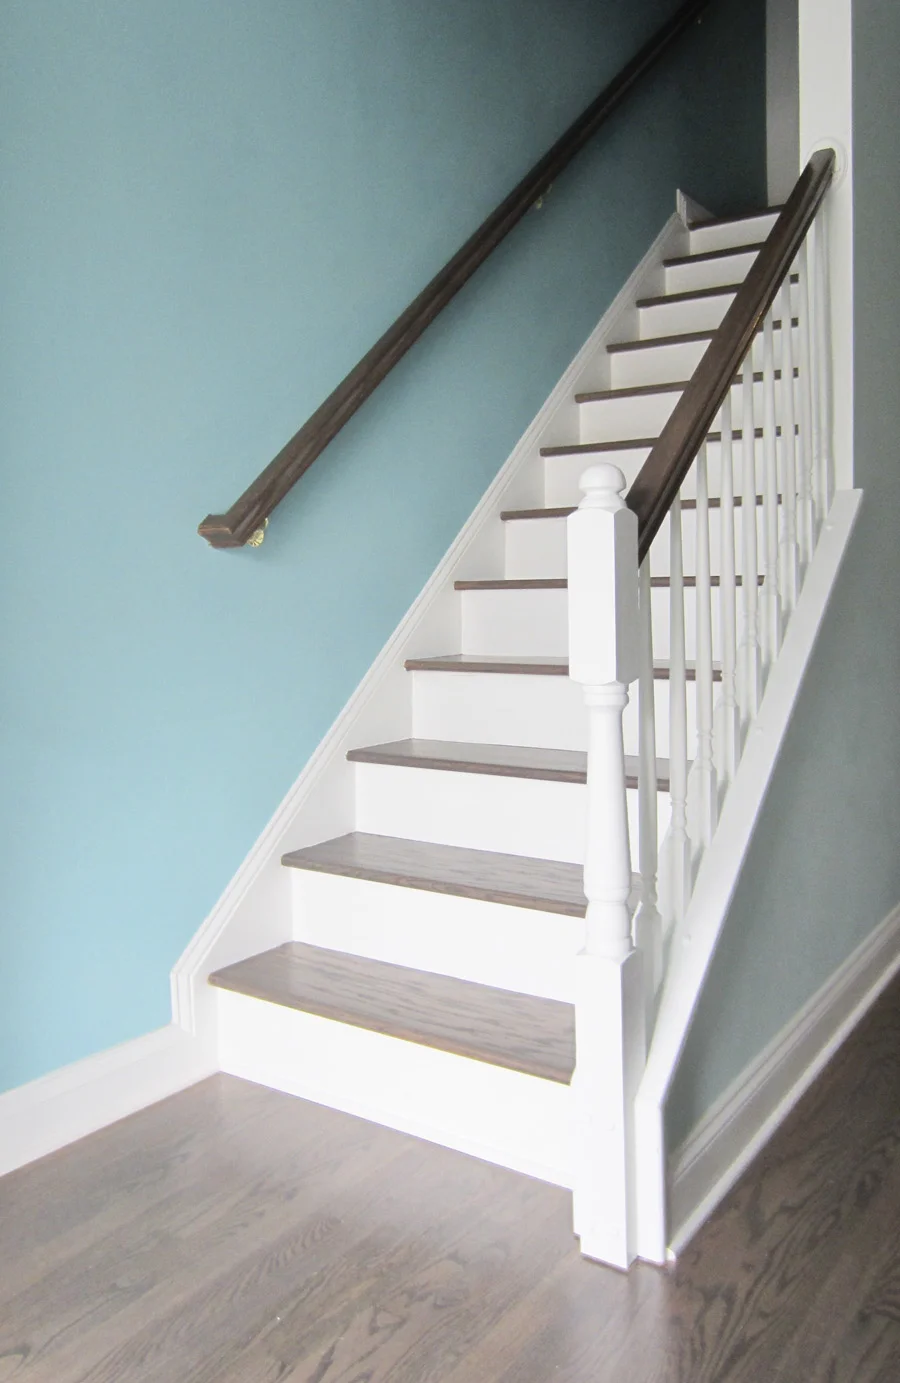
Last weekend I had to take a break from all the victory dancing to tackle the buzzkill that was my staircase. The floors were refinished and beauteous, but the newell posts and handrails  were left untouched. I realized kinda late in the process that they would cost extra if I asked the flooring guys to do them, so in a minor lapse of judgement I decided I’d just do it myself. I have no idea how much more it would have cost, but I’m fairly certain it would have been worth the $$ to have them done at the same time as the floors. 

The stairwell was glaring at me after the floors were refinished

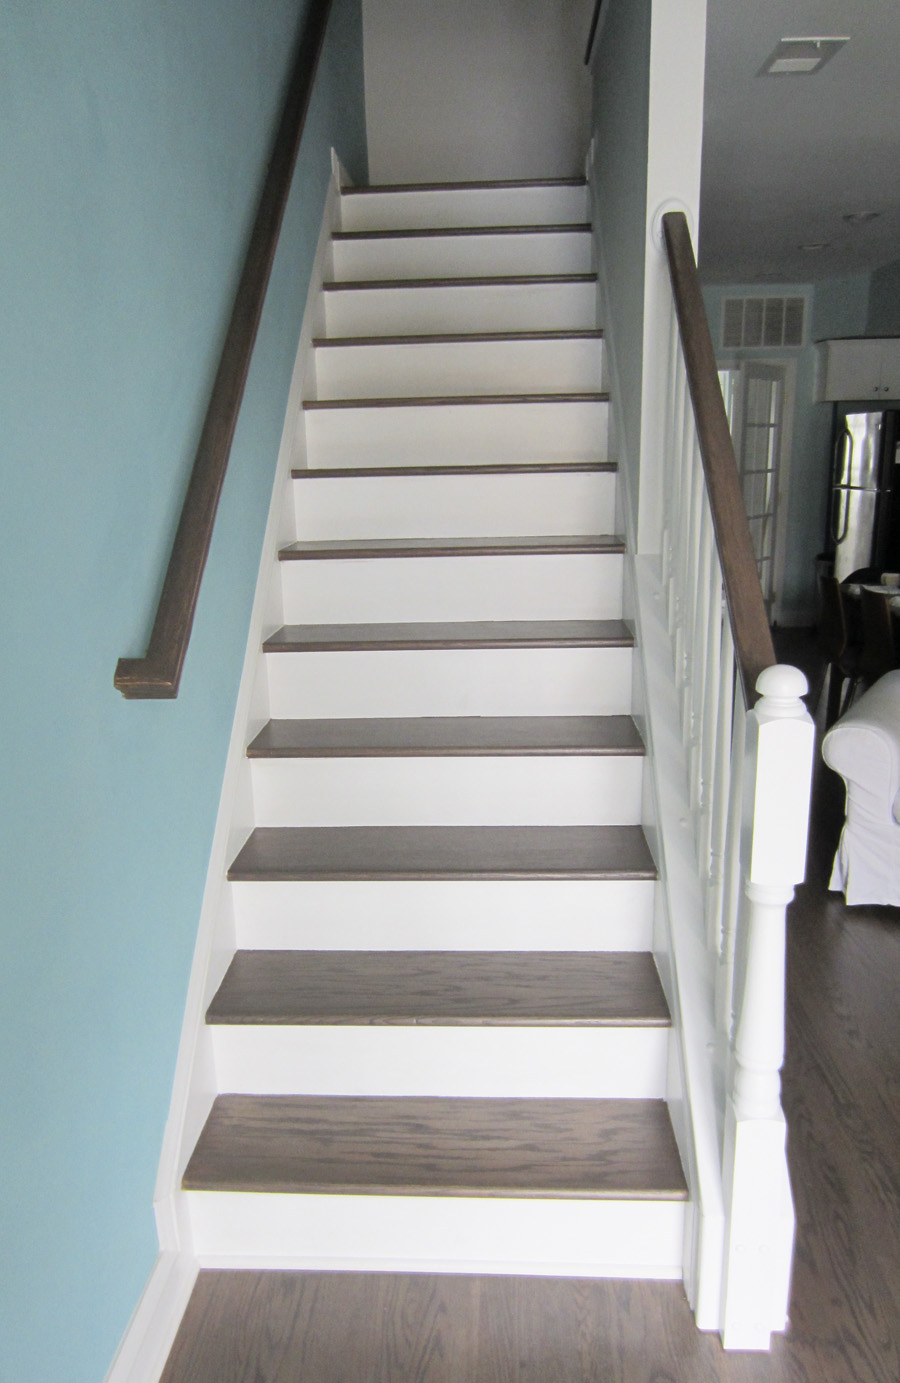
Don’t get me wrong – it wasn’t particularly difficult – just tedious, time-consuming and messy. That said, it did make a huge difference and I recommend it if you’ve got a staircase that could use a facelift. It looks so much better and could be done in a weekend! The folks who renovated the house before we bought it chose generic everything, and poly’d the railings and posts just like the floors. My plan was to paint everything white except the railings, which I’d stain β€œgrayown”, like so: 

Refinishing the stair well was well-worth the effort!
refinished-stairwell-2.jpg

Here’s what I needed to get started:

  • Sandpaper – 60 grit, 220 grit, & 400 grit
  • Orbital hand-sander and Black & Decker Mouse Sander – sorta optional but really helpful
  • Tack cloth
  • Painter's tape
  • Staining brushes
  • Oil-based primer
  • White semi-gloss paint to match trim
  • Stain to match the floors 
  • Water-based polyurethane
  • Paper towels

Step 1: Sanding

Before I could do anything, I had to sand everything with a rough 60-grit to remove the poly and rough up the surface Then I followed up with a fine 200-grit. I conquered my fear of the orbital hand sander and went to town on all the flat bits, like the tops of the railings and the sides of the posts. The orbital is GREAT – so efficient and it has an attached bag for collecting dust. I wish I could have used it to do everything, but it’s not well-suited for nooks and crannies – of which staircases have many. For those I used the Mouse and a sanding block designed for bending around curvy posts. This was by far the worst part of the job… after seeing how fast and effective the orbital was at getting down to nice raw wood, hand-sanding felt like running a race in a vat of jello. I focused most of my energy on the railings, since those needed to be totally raw to accept the stain, and then I just roughed up the posts which were going to be primed anyway. 

I used the DeWalt orbital hand sander to remove most the finish on the stairwell

Step 2: Cleaning

Starting out with the orbital sander, there was minimal dust. When I switched to the Mouse my house turned into the Serengeti. You would have thought I’d sanded an entire Redwood forest down to a few toothpicks there was so much dust, and that's when I most regretted not asking the floor guys to take care of the railings. My new beautiful hardwoods were defiled!! I wiped everything down with a damp rag and then vacuumed, swept, and mopped the entire floor. Then I used a tack cloth to gently wipe down the railings and posts again. Fun fact: Tack cloths are literally tacky – their purpose is to grab all loose particles on a surface before you paint or seal it. The ones I got from Home Depot left a sticky residue on my hands that was really hard to get off, so do yourself a favor hold tack cloth with a clean paper towel. 

Step 3: Taping

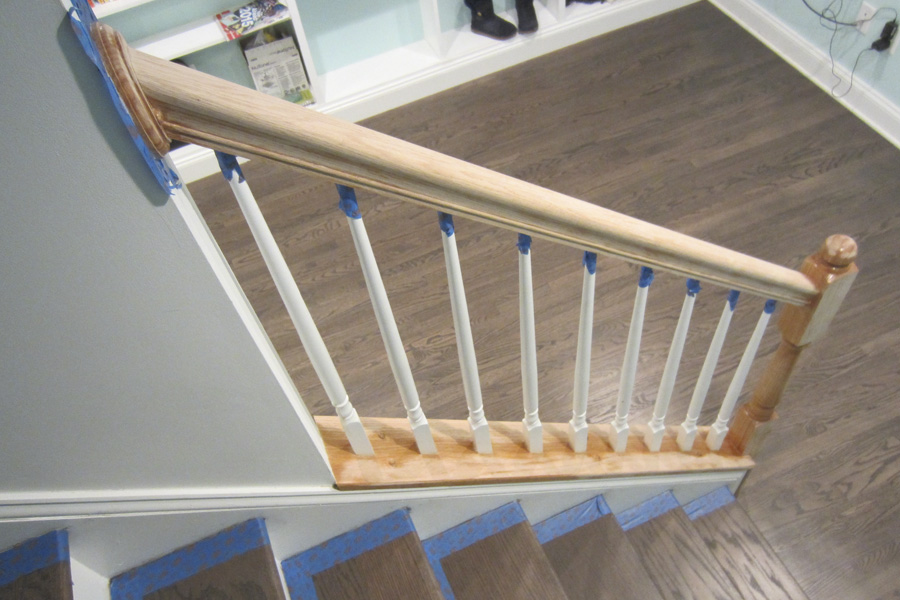
I taped around the steps and balusters to protect the surfaces while staining and painting

I taped the tops of the balusters, the floor around the base of the posts & balusters, and the wall behind the long railing leading to the front door. I knew I’d be touching up the stair risers eventually, so I carefully taped those edges off too.

Step 4: Staining

I used a paper towel to wipe stain on the handrail

The flooring guys left me a quart of leftover stain, which was a real blessing because I didn’t have to stress about whether it would match the floors. Stain is very watery and a breeze to apply, just watch out for drips. After stirring the can, I just dipped the edge of a paper towel in and then wiped it down the railings in the direction of the wood grain. I stained all sides of the railings, including the bottoms. Just like the floors, it took two coats to get a dark enough color. I applied the first coat Saturday night, let it dry overnight and then applied the second coat Sunday morning.

Step 5: Priming

Once the stain was dry enough I taped it off so I could paint the posts

While the railings dried, I applied a thin coat of primer to the posts and the angled base the balusters sit in at the bottom of the stairs (does that have a name??). I focused on the lower sections first, and then taped off the railing edges after they had some time to dry so I could prime the tops of the posts. I made sure to get a really snug fit with the tape – getting into all the curves and notches so I wouldn’t be priming my freshly stained railings. Keep an eye out for drips. I gave the primer about 2 hours to dry, per the instructions on the can.

Primer

Primer on the stairwell posts

3 Coats of Semi-Gloss

I applied 3 coats of white semi-gloss paint to the stairwell posts
I touched up the base of the balusters and around the stair treads

Step 6: Painting

I applied three thin coats of white semi-gloss paint and sanded between each coat with 400-grit sandpaper. I’m not sure the exact shade because it was leftover from the guys who renovated the house, but it’s the same white used on all the trim in our house. While I was at it, I gave the stair risers two fresh coats of paint to cover up the stain marks from the last 2 times the floors were done. Oh Lordy, talk about nerve-wracking! I did not like applying white paint so close to my brand new floors. I was so nervous about dripping paint on the floors or the tape not having a tight enough seal. There were a couple close calls and i had to put my finger nails to serious work, scratching up any paint flecks that dared besmirch the floor.

Risers Before Paint

stairs-before.jpg

Risers After Paint

stairs-after.jpg

Step 7: Sanding and sealing

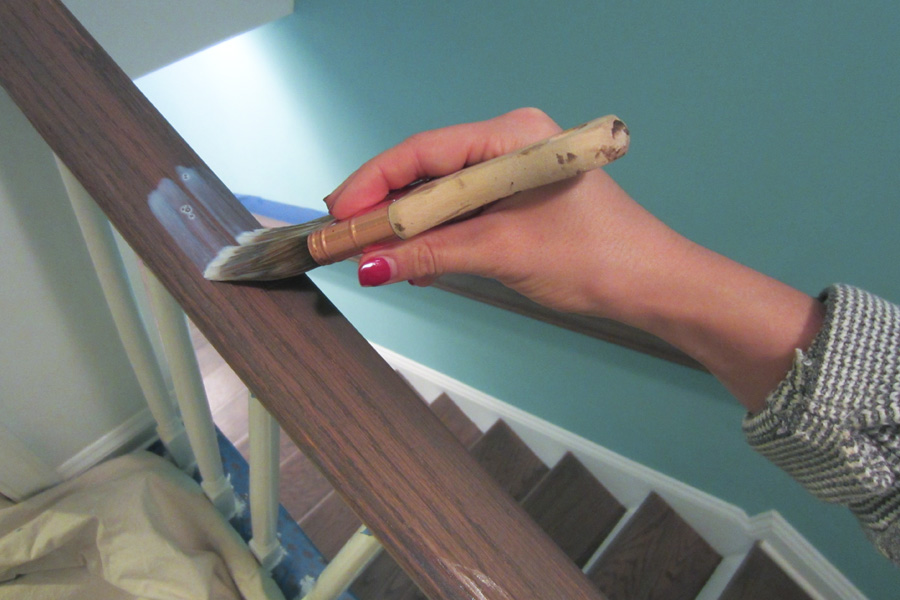
I applied 3 coats of water-based ply to the hand rails

Once everything was 100% dry, I lightly sanded the hand railings with the 400-grit sandpaper which made them incredibly smooth. Then I wiped them down with a clean rag, then a tack cloth, and then I applied three thin coats of poly with a brush. I used crystal clear, water-based poly in a satin finish to match the floors. The sealer I used specified not to apply more than 2 coats in one day, so I put on the first coat, waited an hour, put on the second coat, went to bed and then put on the final coat. And that was that! The stair case is lookin' fresh to death! 

Finished stair well gleaming

Have a great weekend y'all! I'm putting the computer away and spending time with my family to celebrate getting another year older :)